Microsoft Word allows users to build a basic timeline that they can manually customize and adjust to their project’s requirements. However, since the tool is designed mainly for editing copy, it may lack the flexibility that one needs to create more professional-looking visuals and update them easily.
Those who need to constantly create and update project visuals for presentations to clients or executives may find it easier to build their timelines using PowerPoint. On this page, we will show you how to make a timeline both manually in Word and automatically in PowerPoint.
Which tutorial would you like to see?

How to make a timeline in Word
1. Create a basic timeline.
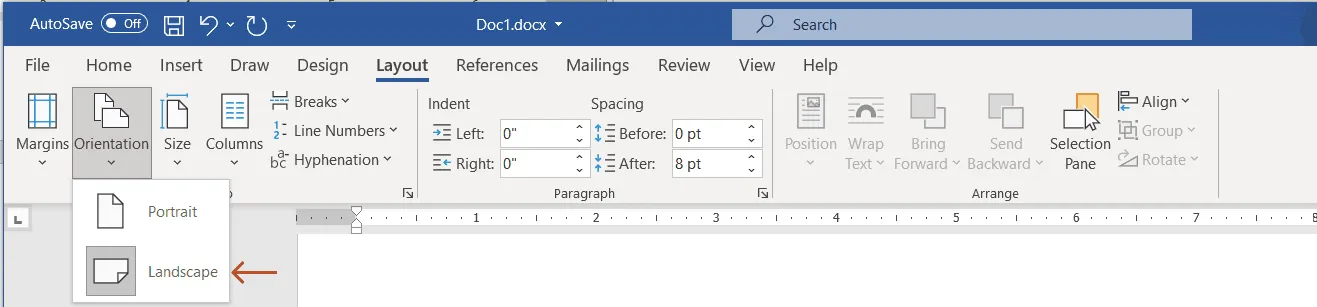
a) Open a new Word document and change the page orientation from Portrait to Landscape, which will make room for more items to be placed on the timeline. To do so, go to the Layout tab on the Word ribbon and click on Orientation.
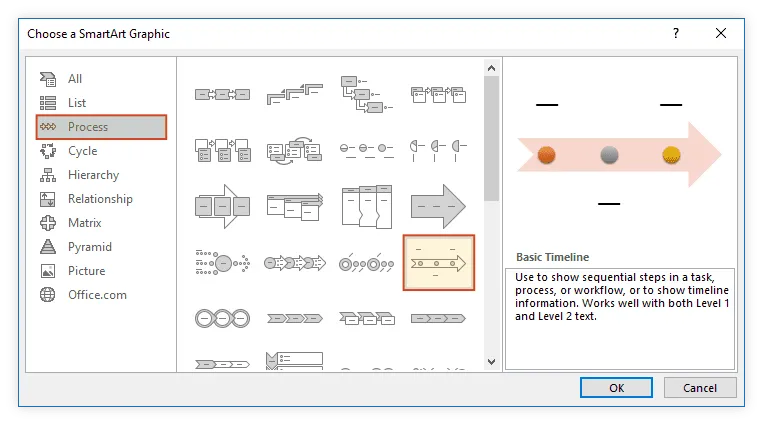
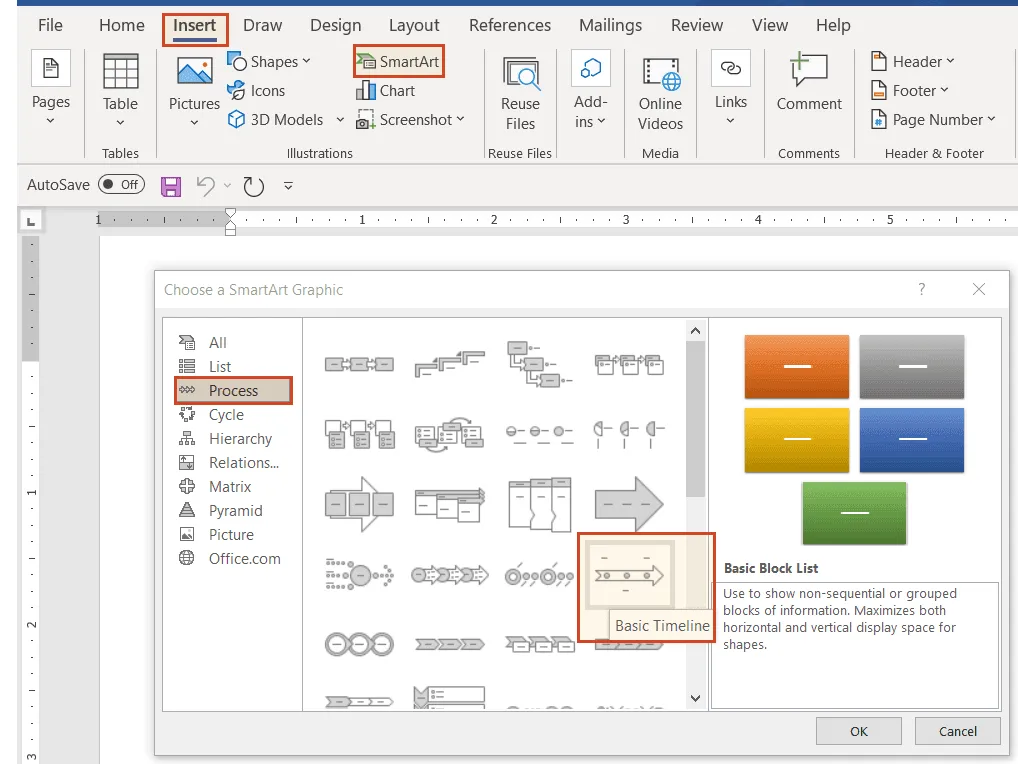
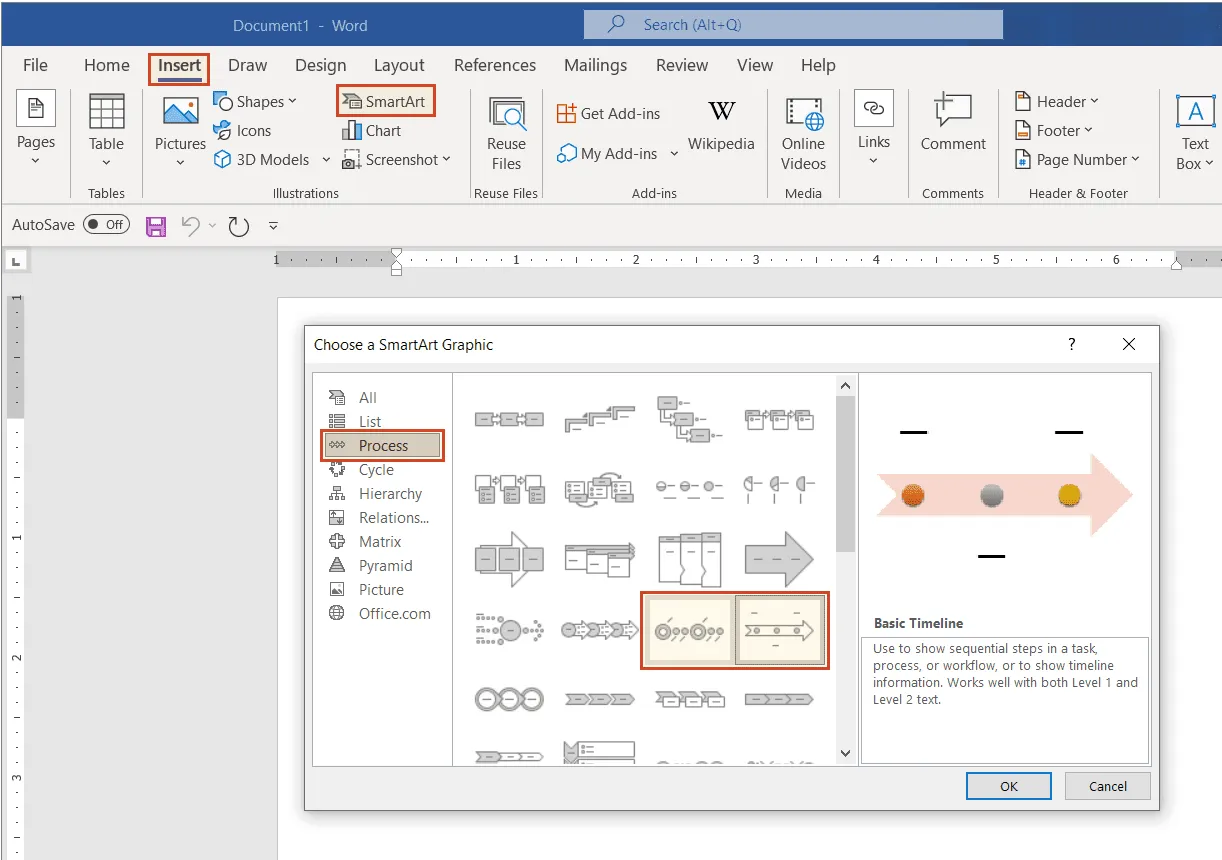
b) Select the Insert tab and click on the SmartArt button in the Illustrations section.

c) Select the Process category within the window that pops up and pick the graphic type that you want to use for your Word timeline. You have a variety of options to choose from, but for a simple timeline that shows the main milestones of a project, we’d recommend going with the Basic Timeline, which you can see bordered below.
If you want to try out different layouts for your timeline, you can always change the style and colors from the SmartArt Design tab on the ribbon.
2. Enter your data.
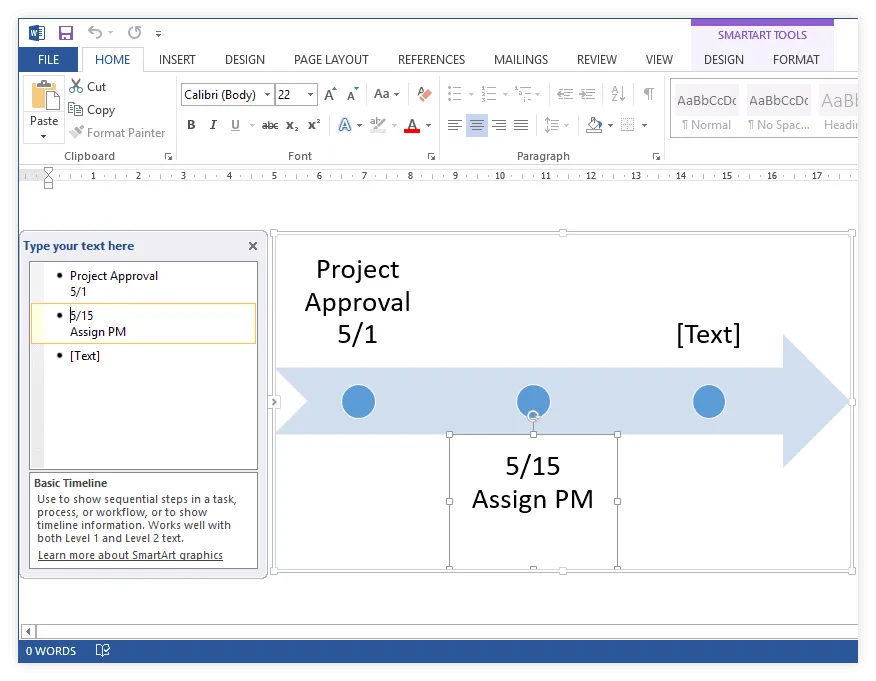
a) Once Word has generated your basic timeline, open the Text Pane by clicking on whichever of the two areas bordered in the image below. You’ll find that updating the default graphic is much easier this way than entering your data directly in the input fields on the timeline.
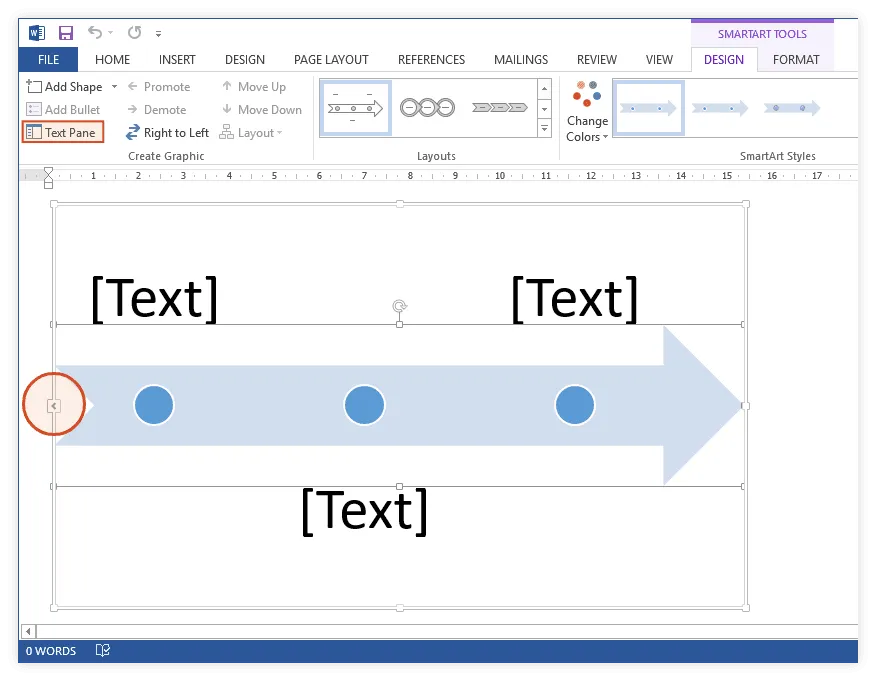
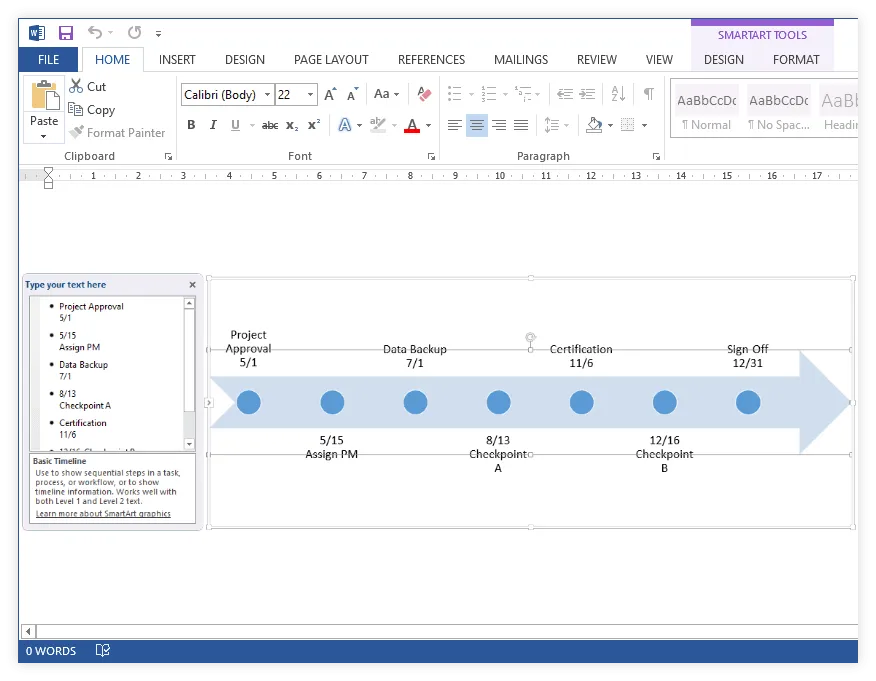
b) Enter your milestone dates and descriptions inside the Text Pane - the graphic will be automatically updated. To show a milestone’s date below or above its description, you can insert a line break using Shift + Enter.
Note: Since Word is not able to automatically calculate time intervals between milestone dates, your milestones will be placed at equal distances on the timeline regardless of the number of days between them. You have the option of manually dragging them closer or farther from one another, but the graphic will get distorted as you add more items. This is why we recommend leaving them as they are.
c) To insert extra events or deliverables on your timeline, simply press Enter after an existing milestone label inside the Text Pane. The more events you add, the more the text size will shrink. This is why a maximum of 7 milestones is recommended to make sure that your data remains legible.
Note: Manually increasing the text size for improved readability may ruin the entire layout of your timeline. A better alternative would be for you to expand the graphic box, which will automatically make the texts larger too.
3. Customize your timeline.
a) Now that your basic timeline is outlined, you can customize its overall look by changing its primary color theme from the Change Colors dropdown menu or by selecting a different style from the SmartArt Styles section. In our example, we applied the Intense Effect style, which made the milestone shapes more prominent.
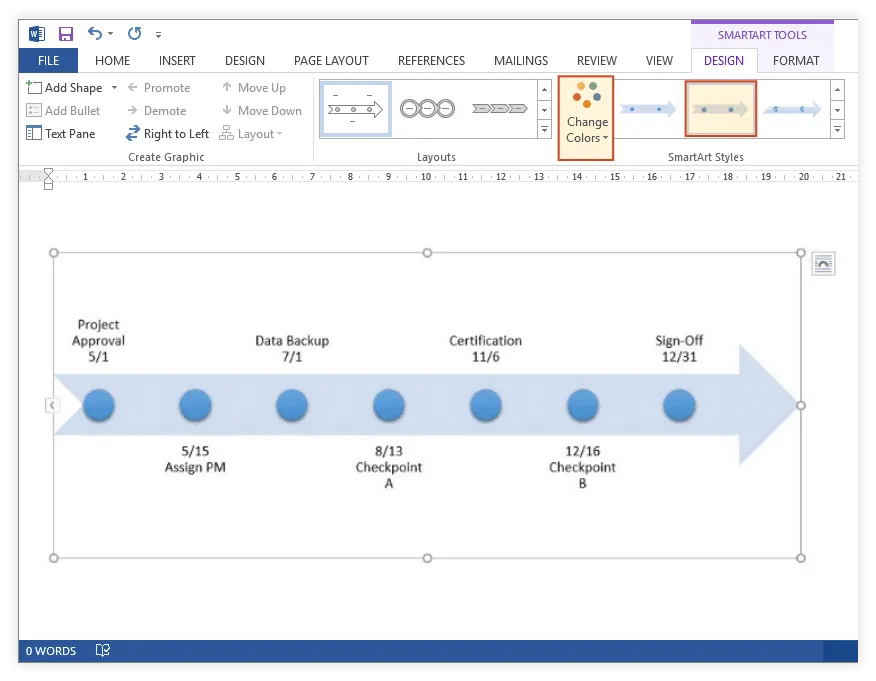
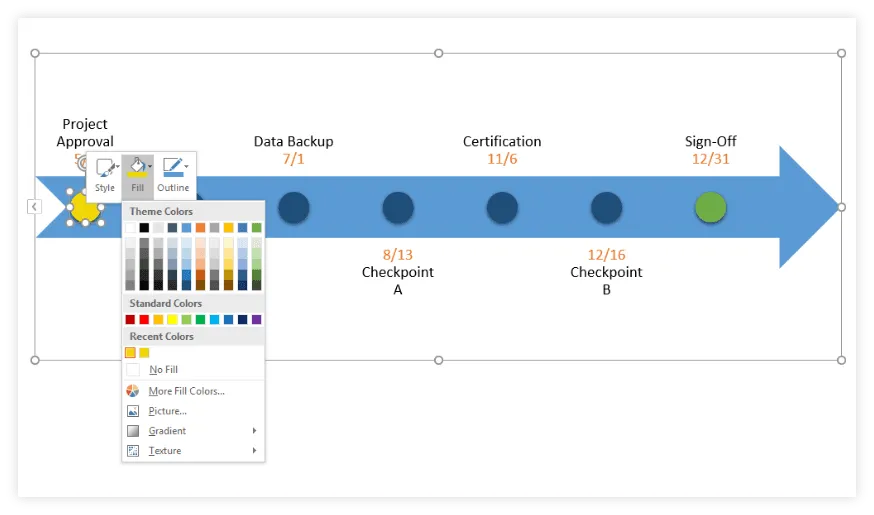
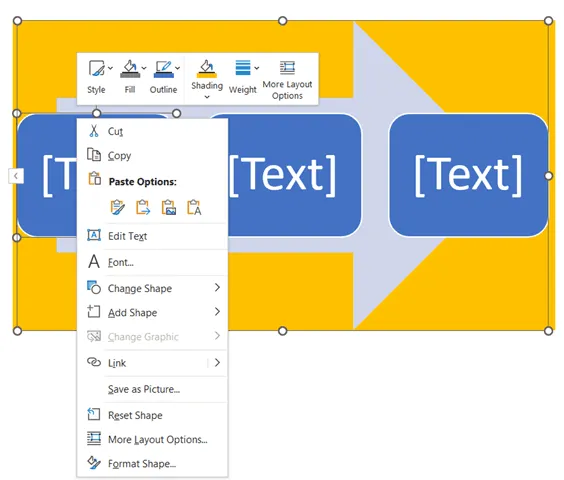
b) To customize individual items on the timeline, use the formatting options available in the small window that appears once you right-click on the specific element you want to personalize. For example, you can change the color of a milestone or of the arrow-shaped band using Shape Fill, and that of the text using Font Color.
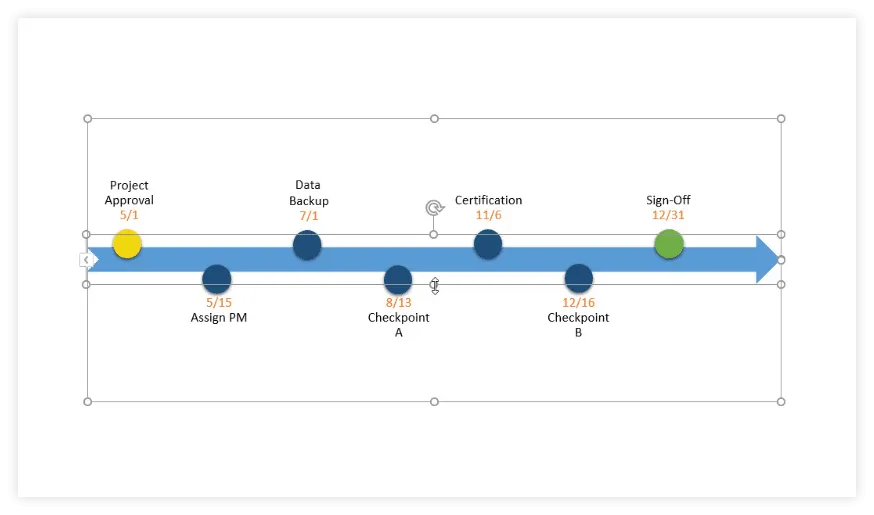
c) Next, you can use Drag & Drop to decrease the width of the arrow shape and move the circles a little higher or lower on the timeline to position them closer to their corresponding descriptions. This should make it easier for your audience to follow the succession of milestones.
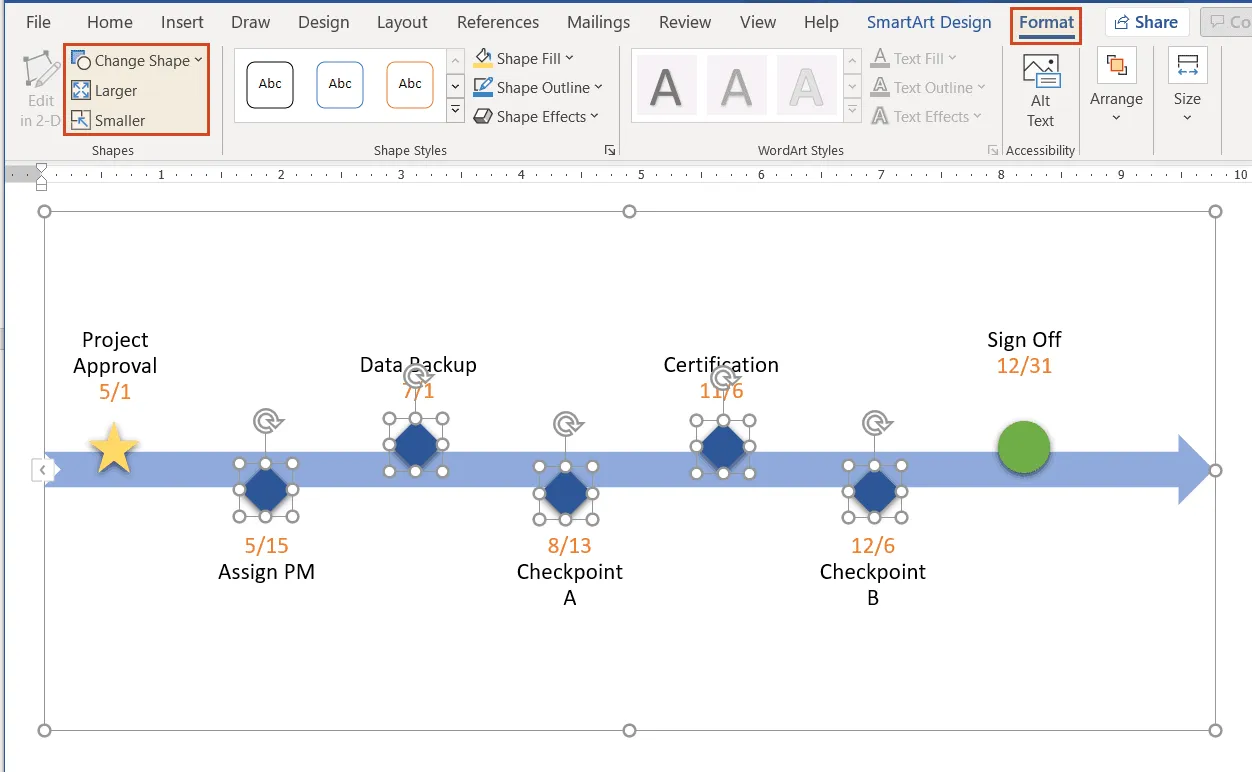
d) Finally, to make certain milestones stand out even more, you can also resize them or change their shape using the options in the Format tab. Select more items at once by pressing and holding the Ctrl key while you click on the needed items.
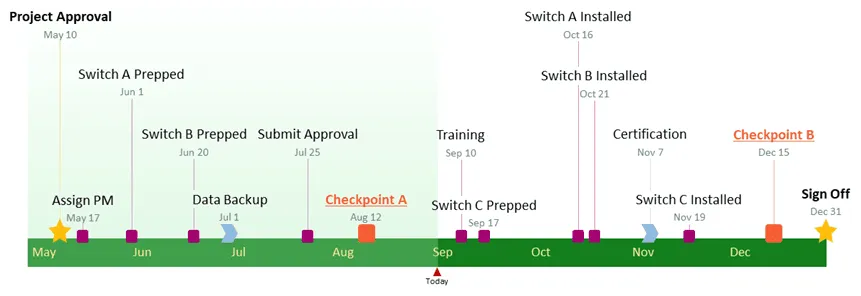
After experimenting with several shape and size options, our MS Word timeline looks like this:
How to make a timeline in PowerPoint automatically
Apart from being time-consuming, manually creating a timeline in Word may also get frustrating if you want to apply custom changes or need to regularly update the visuals for important presentations.
PowerPoint is better suited than MS Word for building visuals to present in client meetings or executive reviews. Below, we will demonstrate how to automatically create and update your graphic using a simple add-in for PowerPoint called Office Timeline. To get started, you first need to install Office Timeline, which will add a timeline maker tab to the PowerPoint ribbon.
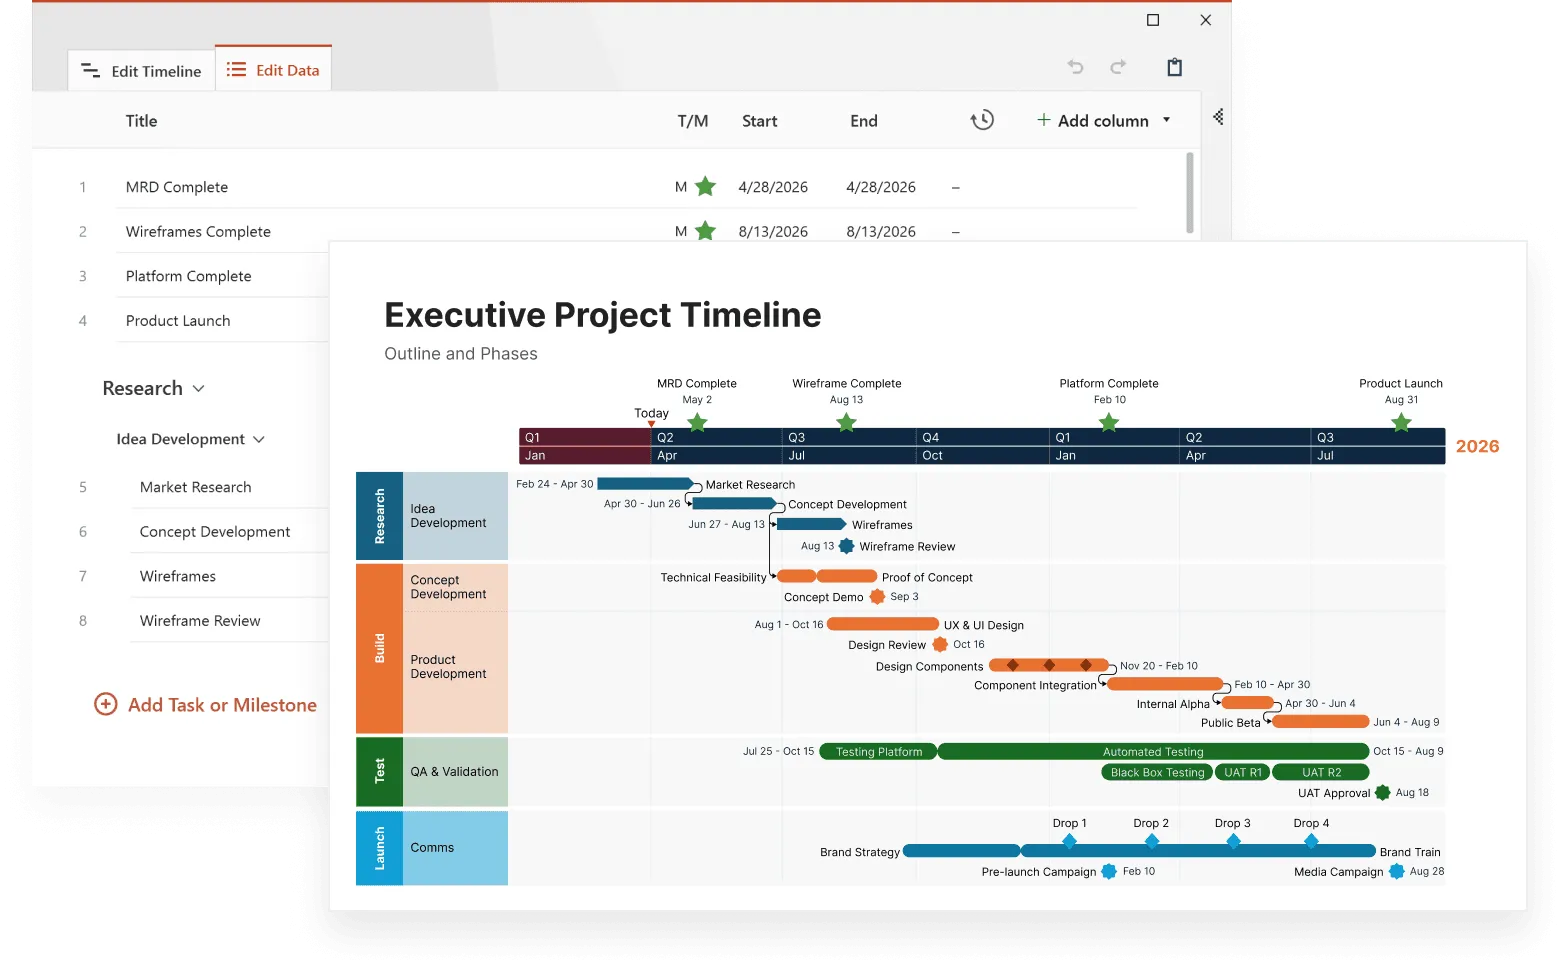
1. Open PowerPoint and enter your data into the Office Timeline Wizard.
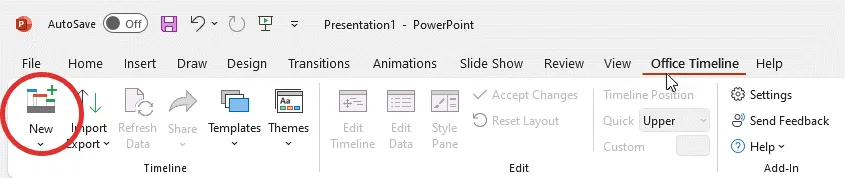
a) Go to the Office Timeline tab you’ll see on the PowerPoint ribbon and click on New.
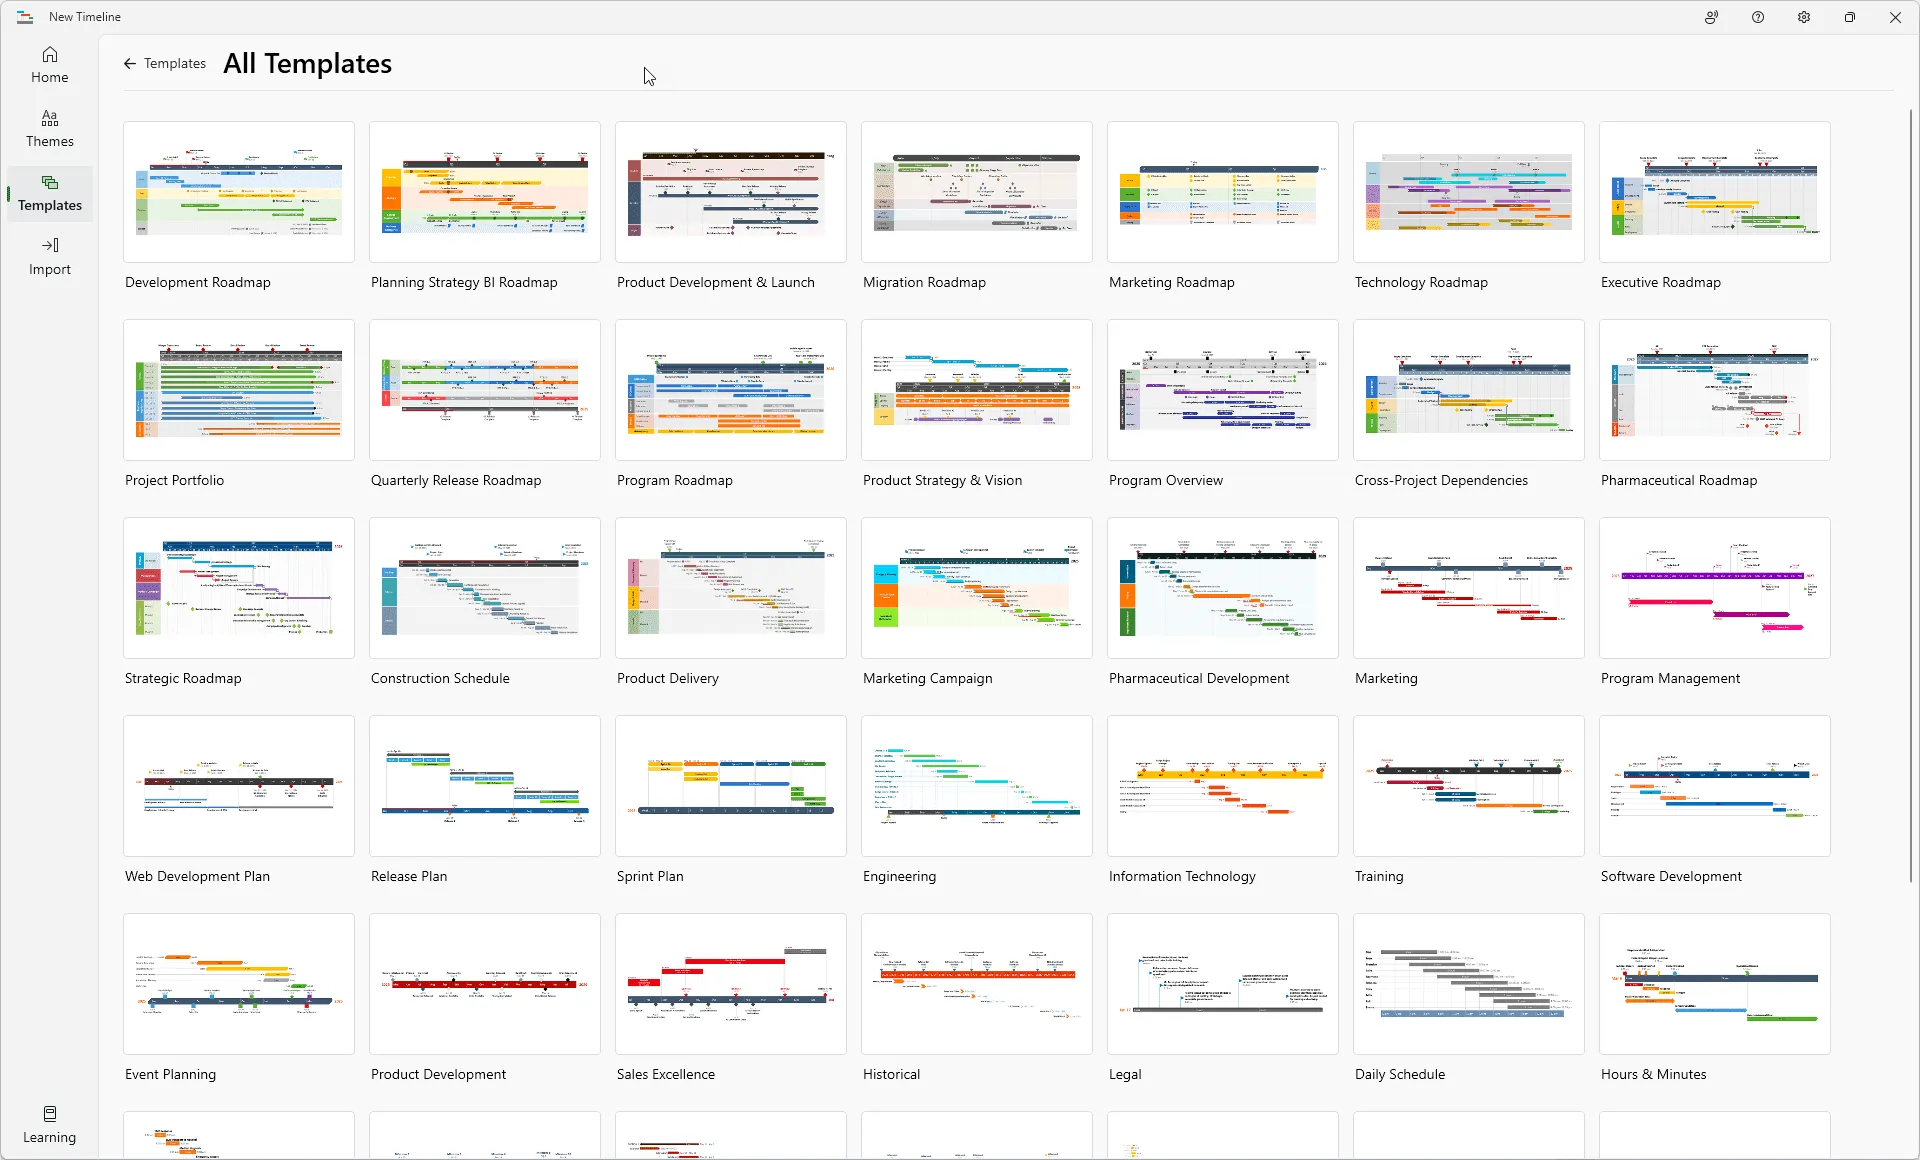
You will be taken to a gallery where you can choose from a variety of styles and templates that you can use for your timeline.
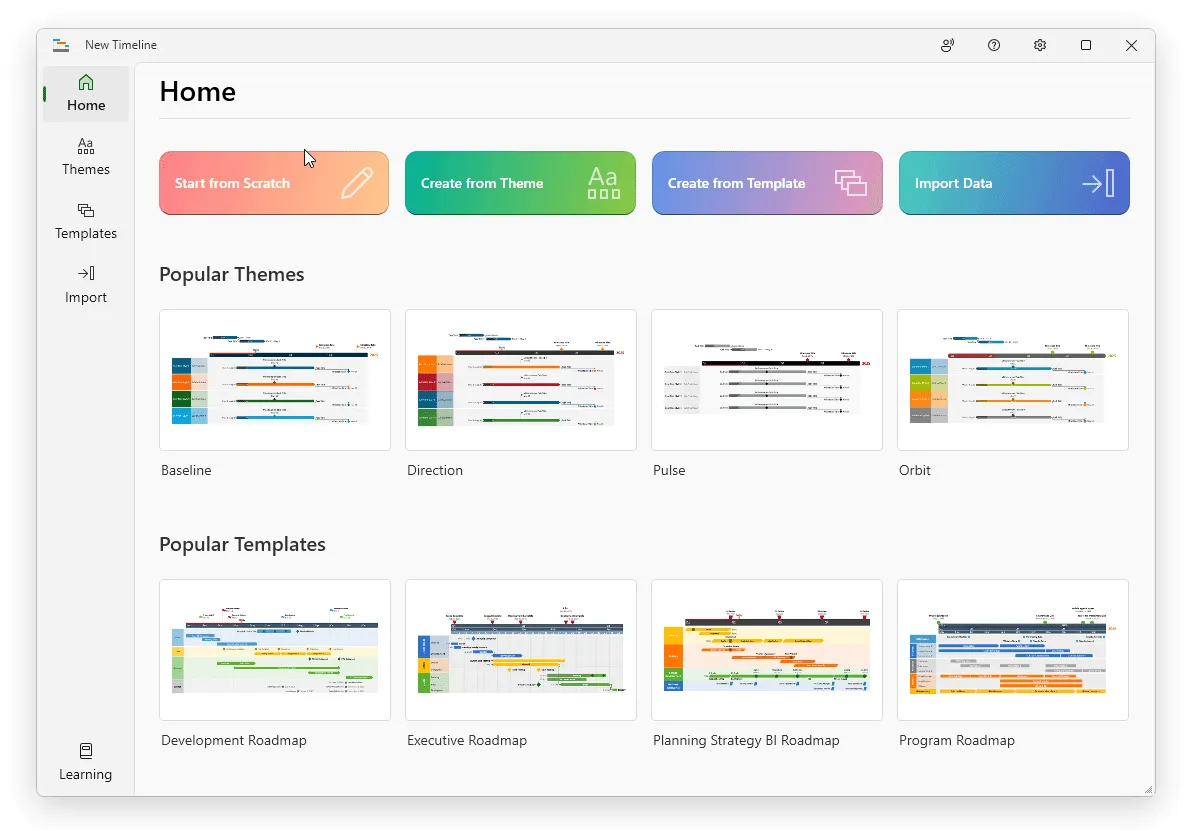
b) Double-click on the template or style you prefer and then select Create timeline in the preview window to open the Edit Data wizard. For our example, we chose a custom template made earlier, which you can download here.
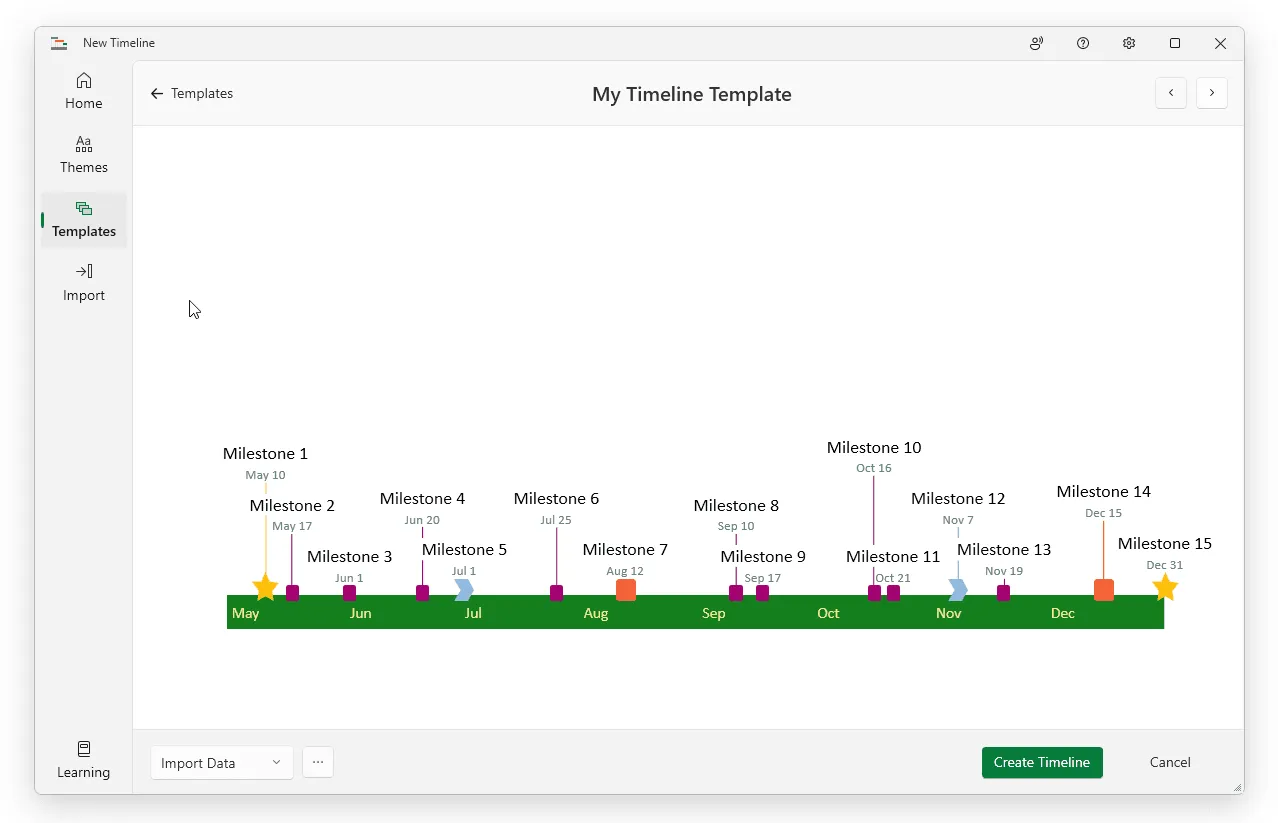
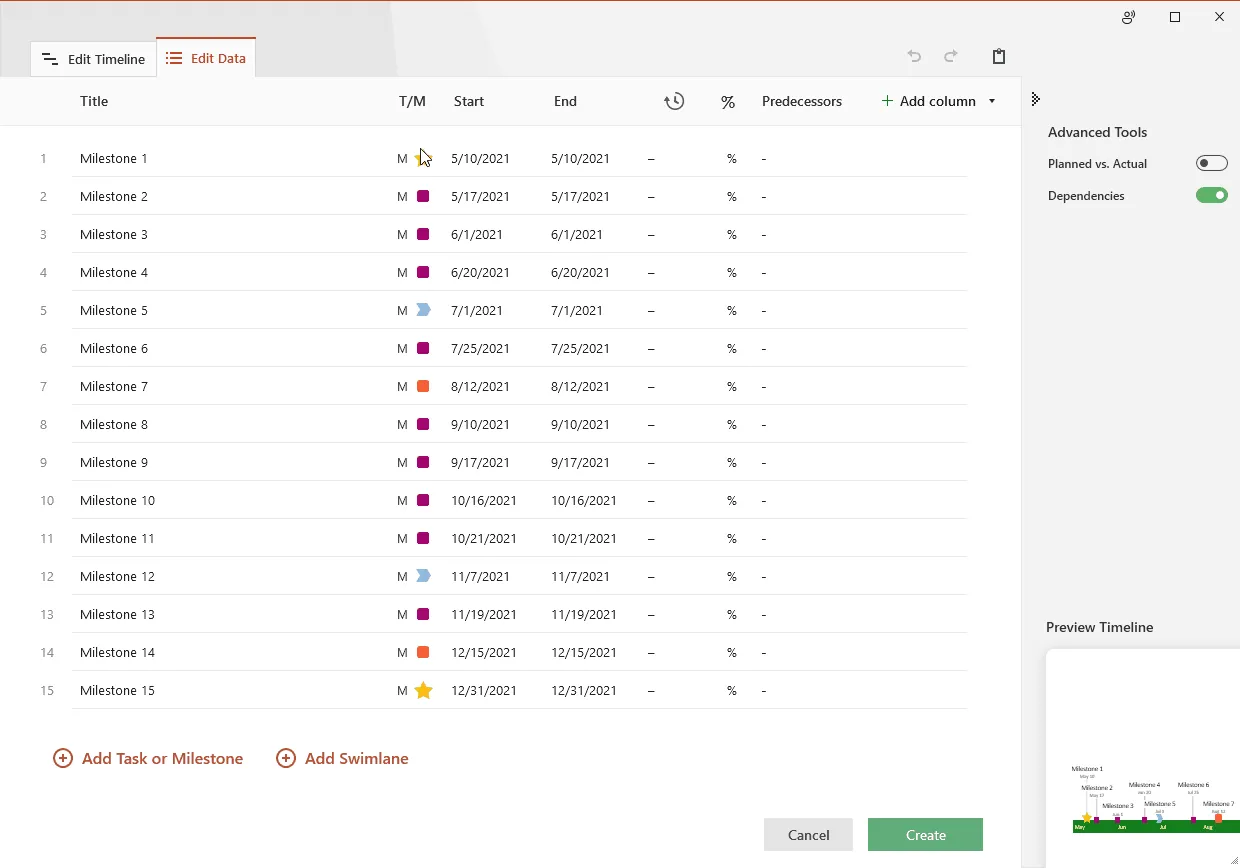
c) In the Edit Data window, you can either manually enter your milestones and set their dates, or you can copy and paste them from an existing Excel file. This is also a good place to start making a few quick customizations, such as changing the color or shape of each item you’ve added. Once you finish, click the Create button.
2. A new timeline slide will be instantly generated in PowerPoint.
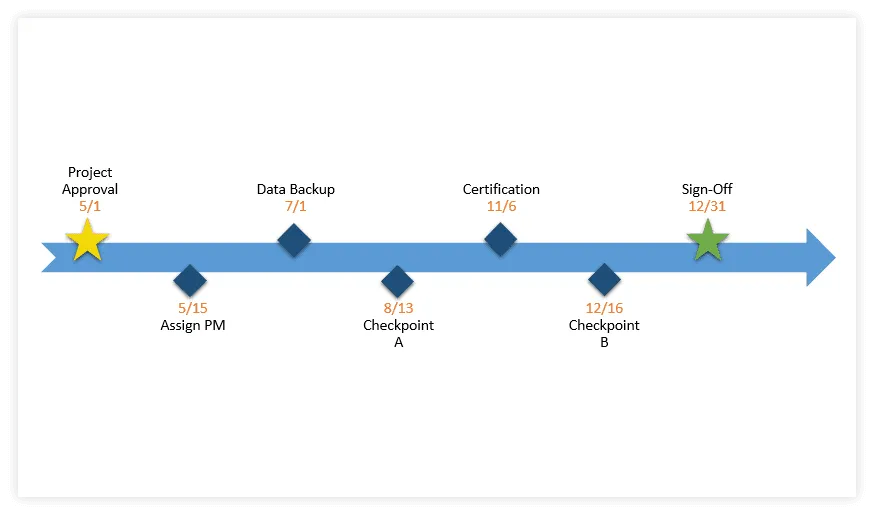
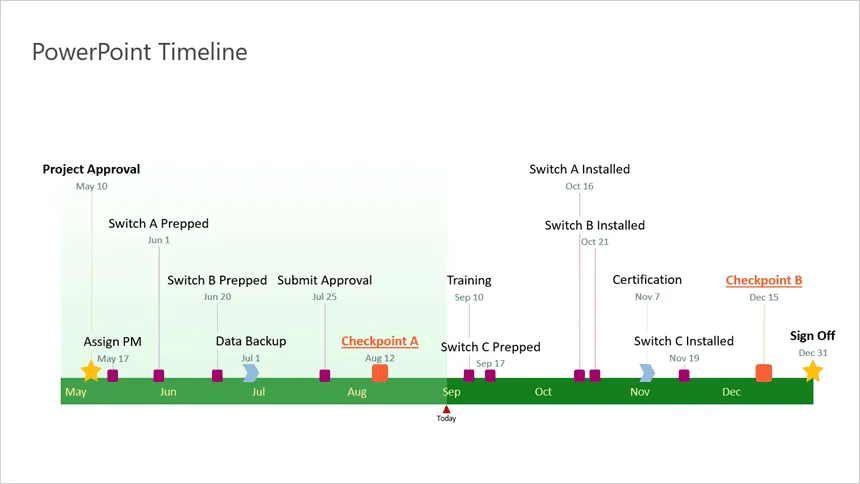
a) Depending on your template choice and the customizations you make, your timeline can look similar to this:
b) Once you’ve built your timeline, you can easily restyle or update it automatically using Office Timeline. For instance, you can change the color, position and date format of any milestone or add new ones on the fly as your plans change, or you can insert tasks as well to create a Gantt chart.
Download auto-generated timeline slide
If you’d like to use the timeline created in this guide as a template to help you move faster, you can download the file below, free of charge.
Get this free timeline template
For more information on how to make timelines using other office or Google tools, check out our comprehensive tutorials.
See how to build a PowerPoint timeline in under 1 minute:
Play Video
FAQs about making timelines in Word
No, Microsoft Word does not have any built-in predesigned timeline templates and, unfortunately, nor can you find too many samples on Microsoft’s official website. Yet, there are various other online resources which offer downloadable timeline templates created in Word. However, we’ve found that most of these often have limited features and are unsuitable when you work with more complex data or higher customization requirements.
What you could do instead is use PowerPoint timeline templates as they look more professional and can also be easily integrated within your Word document. You can find plenty of ready-made timeline templates to choose from by browsing our collection of free templates or create your very own in minutes using our specialized, automated tool called Office Timeline PowerPoint add-in, which helps you save considerable time. Here is an example of how a timeline generated with our PowerPoint tool could look like:

For an even more refined output and access to the most extensive range of customization options, you can try out for free Office Timeline’s premium version for 14 days.
To insert a timeline in Word, follow the steps below:
- From Microsoft Word’s ribbon, go to Insert and choose the SmartArt option in the Illustrations section.
- Inside the Choose a SmartArt Graphic gallery, click Process.
- Select a timeline layout (you can use the classic Basic Timeline or any other process graphic that you find more suitable).
- Click OK.
- Edit text and change the format and colors of your items as needed.
- You can also change the layout (SmartArt Design > Layouts) or apply a different style (SmartArt Design > SmartArt Styles).
As an alternative to these basic-looking visuals, with rather limited functionalities, you can use any of the templates in our timeline templates library to create more refined timelines that can be easily customized, saved as images, and included in your Word documents. Or you can download the free trial of the Office Timeline add-in for PowerPoint, and create beautiful timelines with just a few clicks, using one of the templates that the add-in offers. Here is a preview of just a few of them:
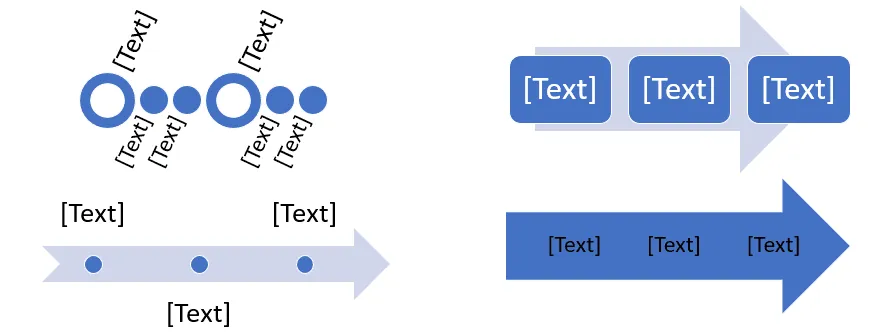
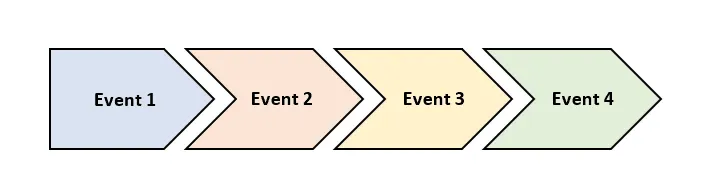
To create a blank timeline in Word, you just need to insert one of the graphics that can be found in the SmartArt > Process section of the Insert tab. Microsoft Word offers several options to build timelines that look similar to the ones below:
Unfortunately, customizing these basic visuals usually requires a lot of manual work, takes a lot of time, and the results are often dissatisfying.
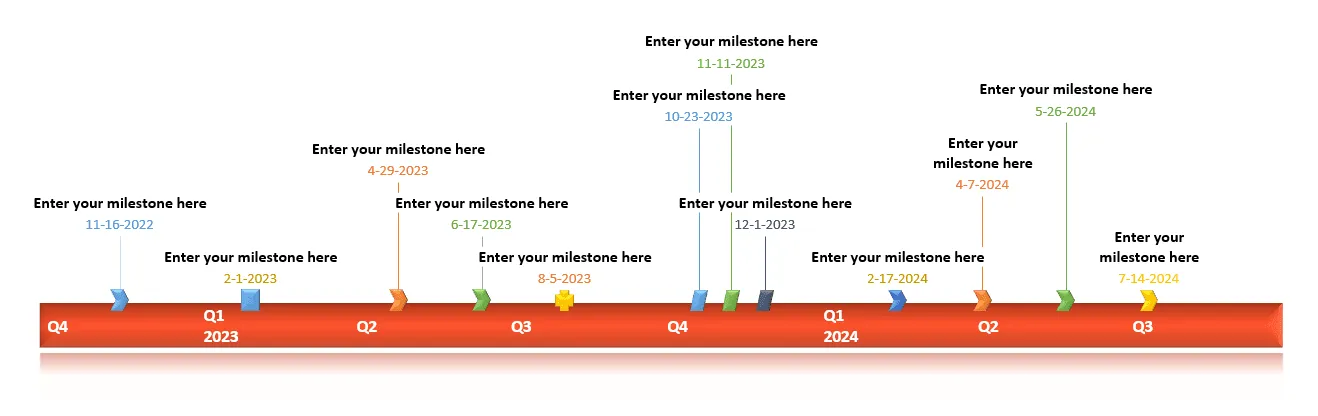
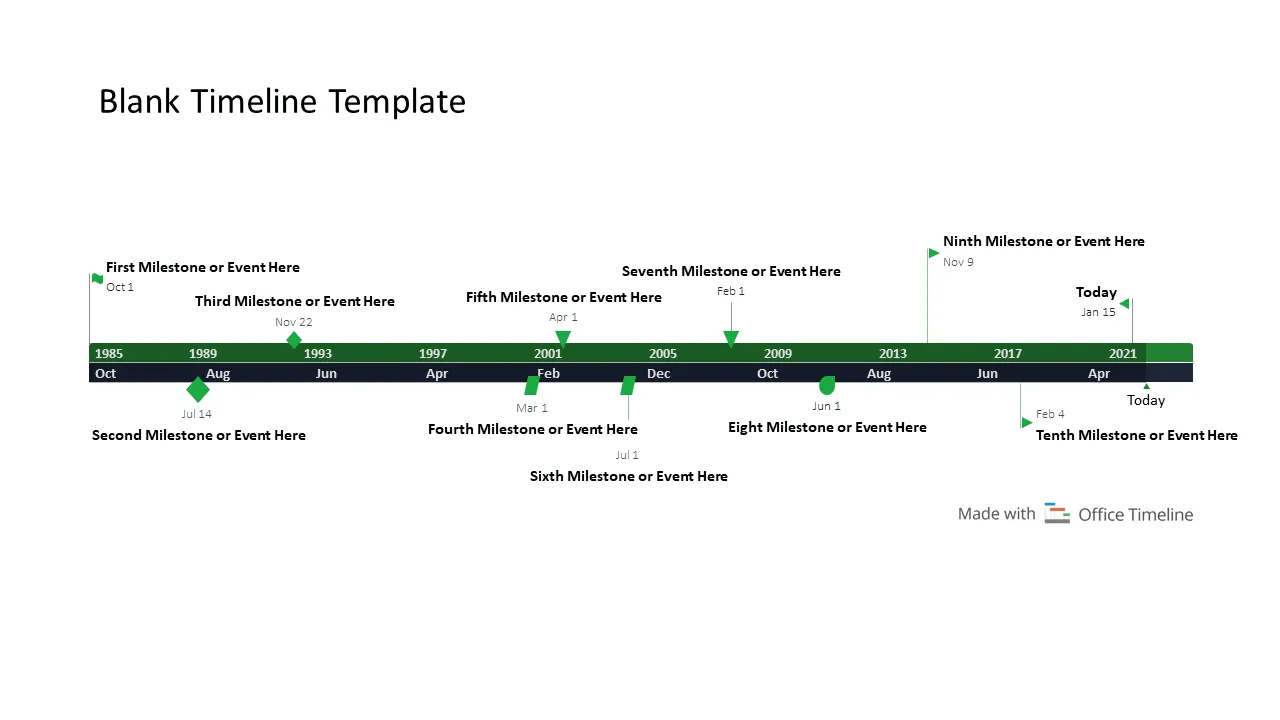
A more effective way to include stylish blank timelines in your Word presentation is to build them in PowerPoint, and then insert them as images. To this end, we suggest using an automated timeline maker like the Office Timeline PowerPoint add-in. It is an easy-to-use tool that helps you quickly produce visuals that look like this:
This timeline template was created with Office Timeline. You can try out for free the premium edition of Office Timeline. A simple to use and time-saving tool, it is the perfect solution if you’re looking to generate more complex timelines for professional presentations. You just pick the template you like, enter your own data, and you’re ready to roll. The visuals are easy to include in your Word document or in any presentation created with the Microsoft Office tools.
Word does not have any built-in timeline templates, but you can create your own basic timeline to include in your Word presentation by going to the Insert tab and selecting SmartArt. Then, in the Choose a SmartArt Graphic gallery, click Process and select one of the two classic timeline formats there - Basic Timeline or Circle Accent Timeline.
Alternatively, you can find plenty of online timeline templates in PowerPoint that you can save as images and include in your Word documents. One such reliable resource is our library of free timeline templates that you can easily customize and turn into stylish, crisp visuals to complement your data presentations. Here’s a preview of just a few of the templates that you can download and use for free:

Yes, you can make a basic timeline in Word by using the SmartArt feature found under the Insert tab. Then, in the Process category, you have a few options you can choose from. All you need to do next is customize shapes, colors, and fonts to make the visual look more like a timeline. Here are the steps to follow:
- Go to Insert and select SmartArt.
- In the Choose a SmartArt Graphic gallery that opens, select Process.
- Choose a graphic and click OK.
- Edit text. Click on any shape, then type to add or modify text.
- Customize color, change shape or layout.
For this, select any shape and right-click on it to open the customization options.
Although it is possible to create timelines in Word, the resulting visuals have a rather rudimentary look and limited functionalities, which makes them suitable only for simple, low-density data representations.
Alternatively, you can easily build sophisticated, complex timelines in PowerPoint that you can then integrate as images in your Microsoft Word presentations. To do this, simply use any of the ready-made PowerPoint templates from our timeline template collection or the automated timeline maker called Office Timeline.
Explore the tool’s premium range of powerful customization options to the fullest with our free 14-day trial, and create professional-looking timelines that can be effortlessly customized, saved as images, or used in any way you might find useful. Out of the various timelines that you could generate with just a few clicks and quickly include in your Word presentation, here is an example:
If you’re looking for other ways to make timelines, check out our series of detailed tutorials on how to make timelines with your usual office tools.
Chronological timelines are a great way to organize information and see events in order. You can use Microsoft Word to create a chronological timeline using shapes, colors, and text. Here are the steps:
- Make a list with the events you want to include in your timeline in chronological order.
- In Microsoft Word, click Insert and select Shapes. Choose the shape you want to use.
- Draw your shape on the page. To do this, click and hold your mouse button down while you drag the cursor to draw the shape.
- Make customizations. Select the shape, then click on the Shape Format tab. Use the Shape Fill or Shape Outline options in the Shape Styles group to change colors or outlines.
- After making customizations to one shape, copy-paste it to add as many similar items as you need in your timeline.
- Add text. In the Insert Shape group, go to Draw Text Box to add text boxes to the shapes in your timeline. Type in or copy the events from the list that you created in Step 1.
Your timeline could look like this:
If you want to save time and energy, you can use an automated tool like Office Timeline to generate a chronological timeline with enhanced looks and better functionality. The tool’s free 14-day trial gives you access to features such as multiple timescales for a more visually appealing presentation of your timeline content, as well as a variety of templates to expedite your timeline creation process. Here’s a preview of a chronological timeline template available in Office Timeline: