Options for making a PowerPoint roadmap
Roadmaps are visuals that summarize a strategic plan of action, offering a concise view on the evolution of a business objective. From simple project overviews with milestones and tasks to unique, stylish charts, roadmaps have one mission: to show all the info you need at a glance.
We are here to offer you the best solutions to making efficient, professional-looking roadmap PowerPoint slides so often required in executive presentations. If you want to learn how to make roadmaps using other office tools, be sure to explore our roadmap tutorials page.
Which tutorial would you like to see?
How to make a roadmap in PowerPoint manually
First of all, let’s assess what we need. We want our roadmap to be a visual that correlates specific time references with a project and its components. And we want to be able to add some tasks and milestones on the way.
Thus, if we want to have a time reference on our roadmap, we’ll need a timescale. Also, to be able to visually group projects and project components, some guiding sections or swimlanes would be nice.
In PowerPoint, the first impulse would be to draw boxes for each of these items and then customize them, but this would take a lot of time. Instead, we found that it would be easier and would take less time to organize all the info in a table.
So, let’s see where this takes us.
1. Insert a table.
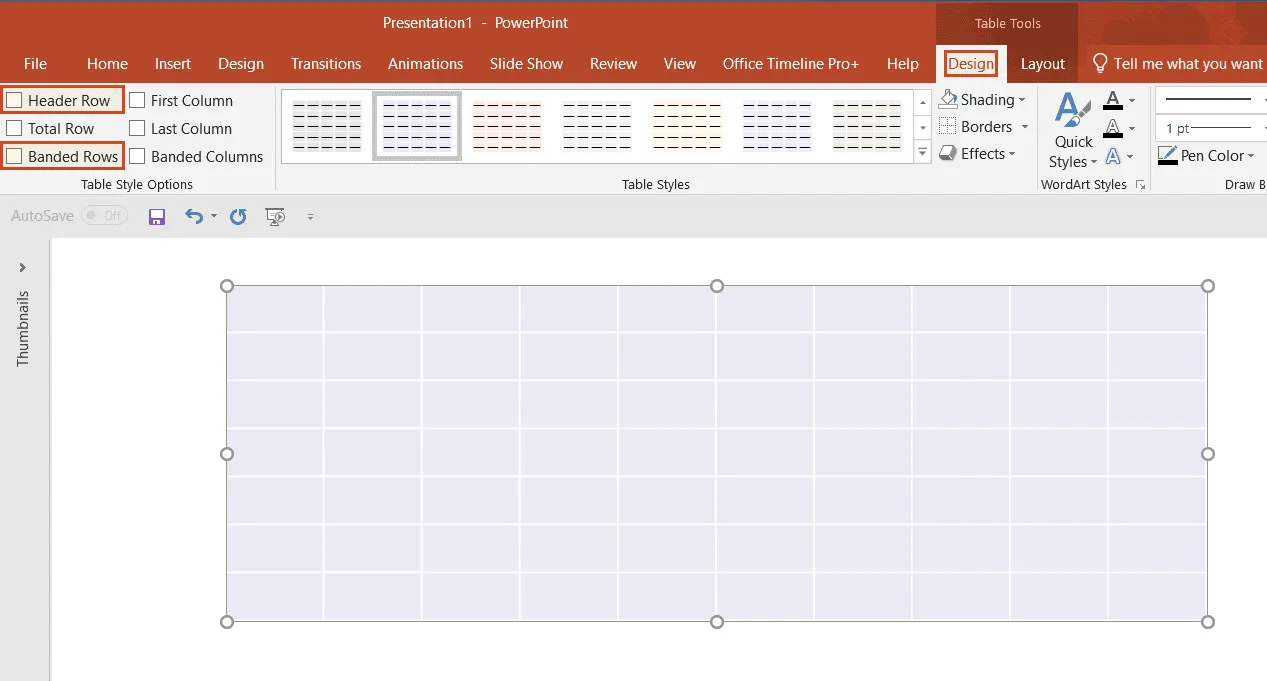
a) To insert a table, go to the Insert tab, click on Table, and then select as many rows and columns as you need. Don’t worry too much about the size of your table now, you’ll be able to add or delete rows and columns later, as needed.

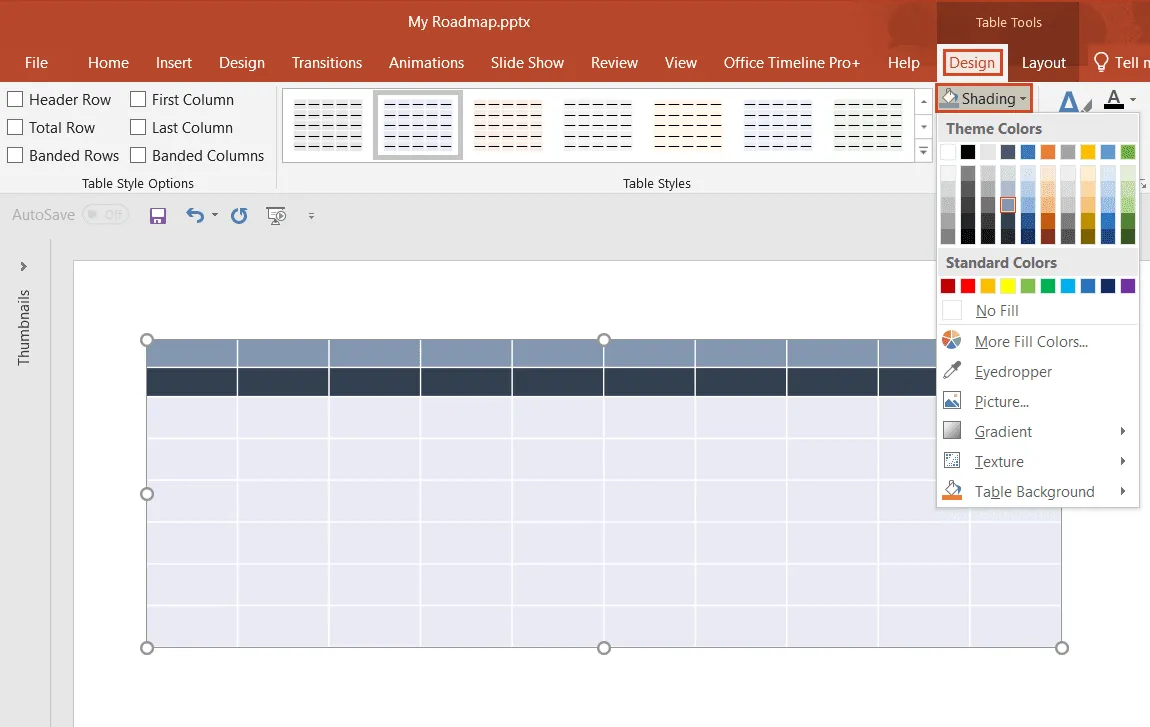
b) A table with a highlighted header row and alternating colored rows will be inserted. Since the default formatting does not match the design we have envisioned for our roadmap, we’ll adjust it. For this, we unchecked Header Row and Banded Rows in Table Tools > Design.
2. Define the timescale.
Now we need to customize our table to make a timescale for our roadmap.
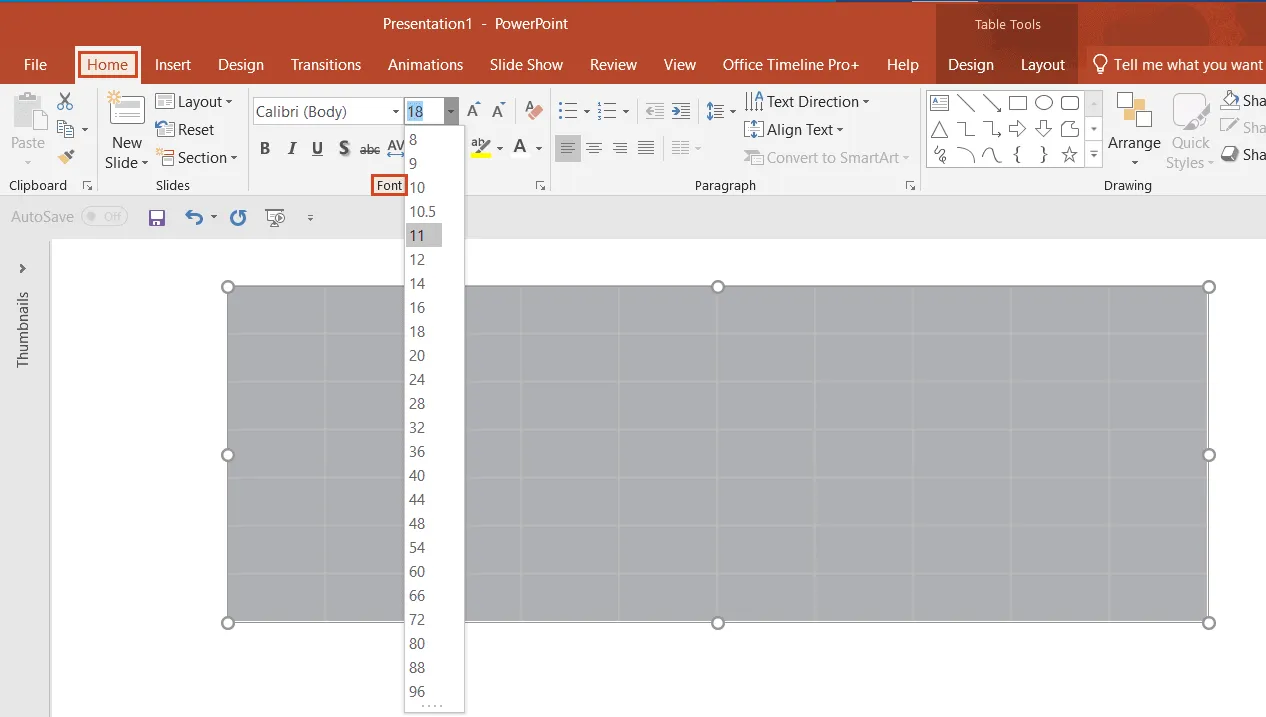
a) We noticed that the default font size was 18 (quite large). This means that not only will the text be very large, but you won’t be able to decrease row height if you needed to. So, now it would be a good idea to set a smaller font for the entire table. To do this, make sure to select all the rows in the table. Then, go to Home > Font and select the preferred value from the font size drop-down menu. We chose size 11 for now.
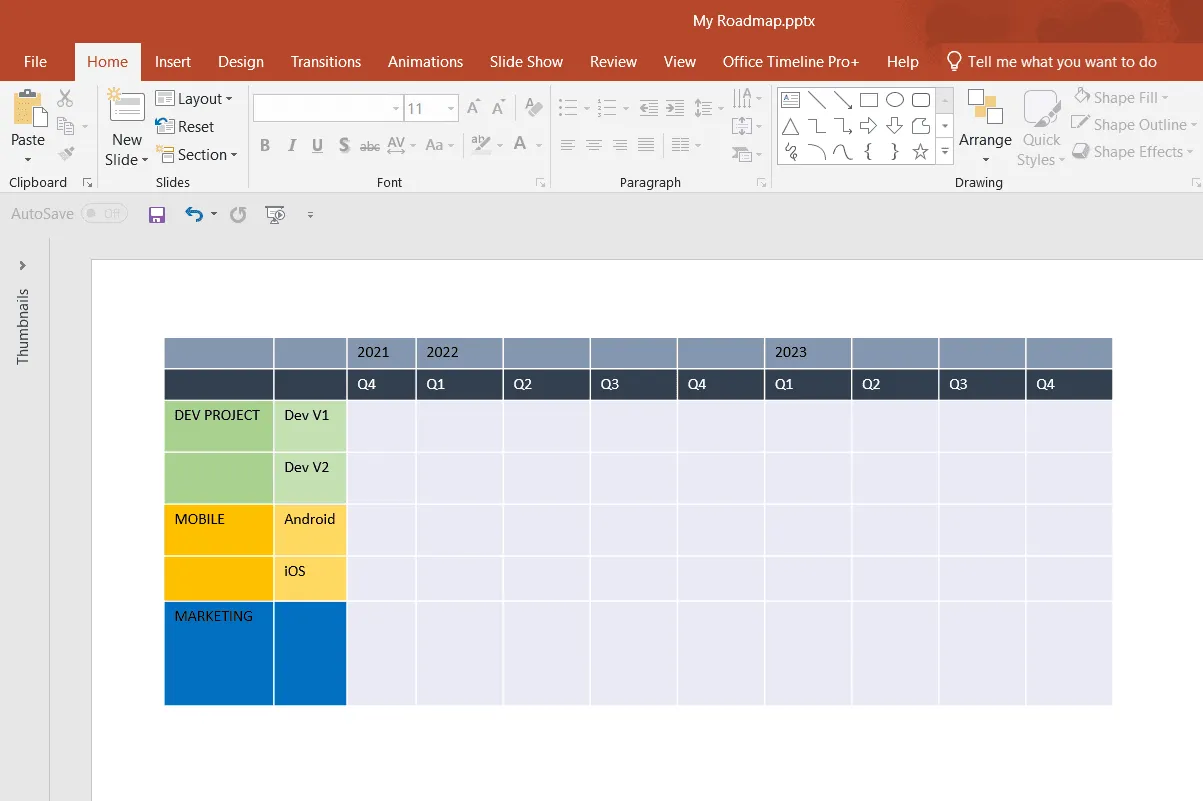
b) Format the first row in the table the way you want your timeband to look like. For this, you can change the color of a row, or resize rows by dragging them as needed. To change the color, go to the Table Tools > Design > Shading. Since we wanted to show both years and quarters, we formatted the first two rows of our table so that we could create a double-layered timeband.
3. Define swimlanes for each project.
a) Enter the project names - main and secondary - in the first two columns. Set different colors to better highlight them and make it easier to group the associated component items that you want to add.
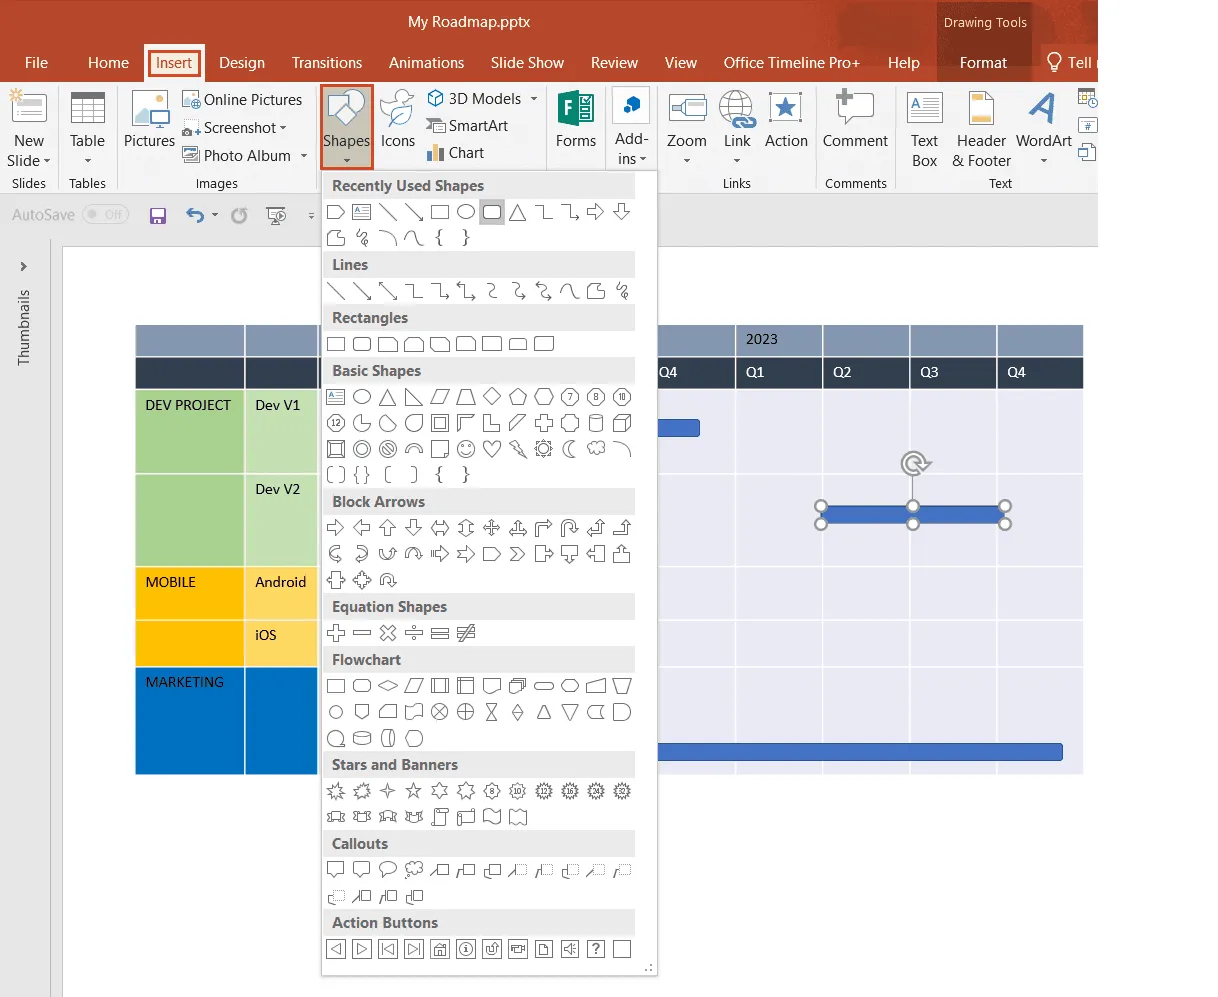
b) On each swimlane, insert shapes to visually represent your project phases, tasks, and milestones. To do this, go to Insert > Shapes, choose the preferred options, and then place them within the swimlane in accordance with their duration (for tasks or phases) or due date (for milestones). Use the top timescale as a reference point to determine their positioning.
4. Customize the roadmap.
At this point, you can customize project items, change color and size, and add text labels to the tasks and milestones on the roadmap.
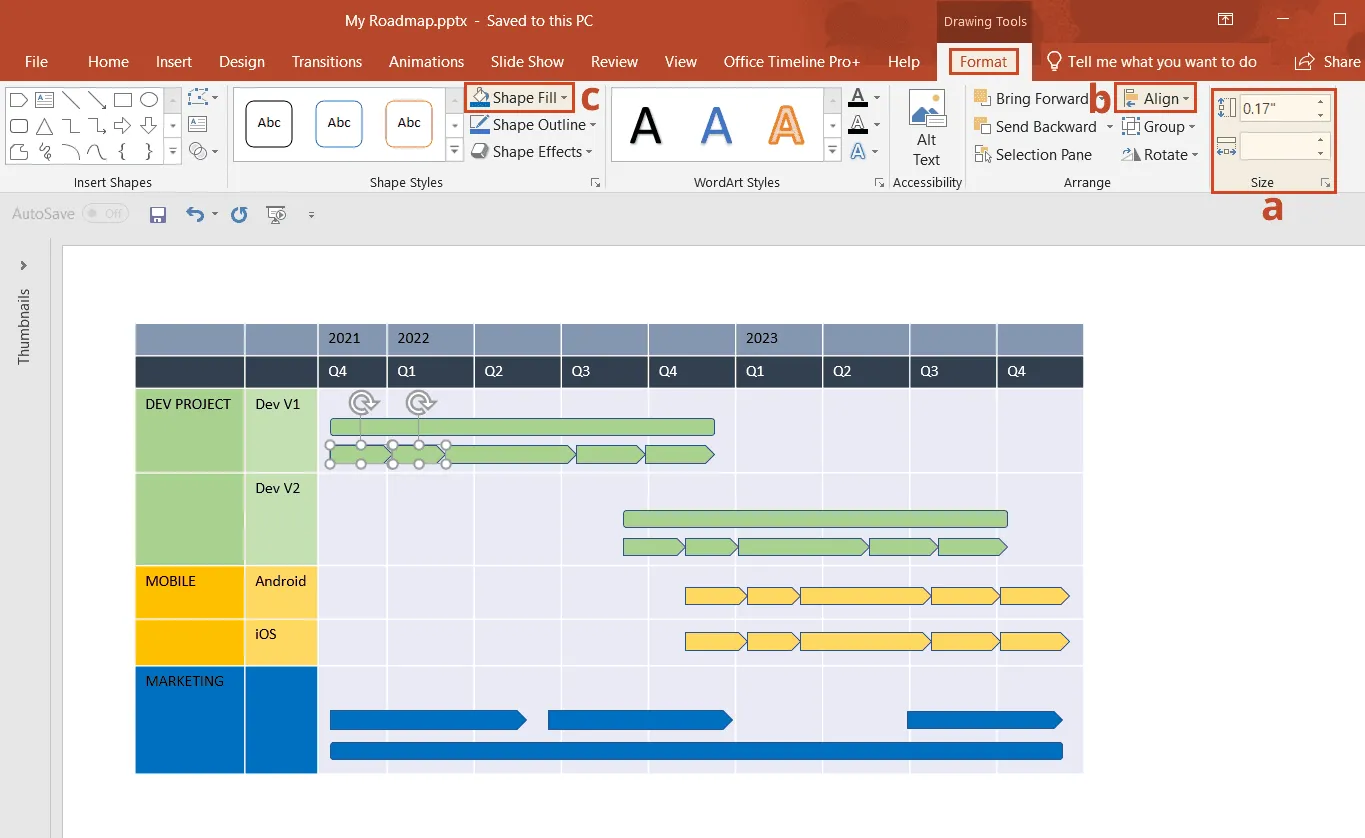
a) Resize shapes. Select all the shapes you want to customize by clicking each while pressing and holding Ctrl; then, to make all the items the same size, go to Drawing Tools > Format > Size and set shape height and width.
b) Align shapes. To align shapes on the same line, select them and go to Drawing Tools > Format > Arrange > Align > Align Middle.
c) Highlight items in different projects. To better differentiate between tasks and phases of distinct projects, you can change the color of the roadmap shapes to match the one used for their corresponding swimlane header (displaying the project names). Make this type of adjustment by going to Drawing > Format > Shape Fill.
d) Add titles to phases and milestones. To add text to the project phases, tasks, and milestones on your roadmap slide, you can either simply double click on any shape and start typing right inside the selected shape or go to Insert > Text> Text box to enter a text box outside the shape. To change the default font settings, go to Home > Font and then choose font size, type or color as needed.
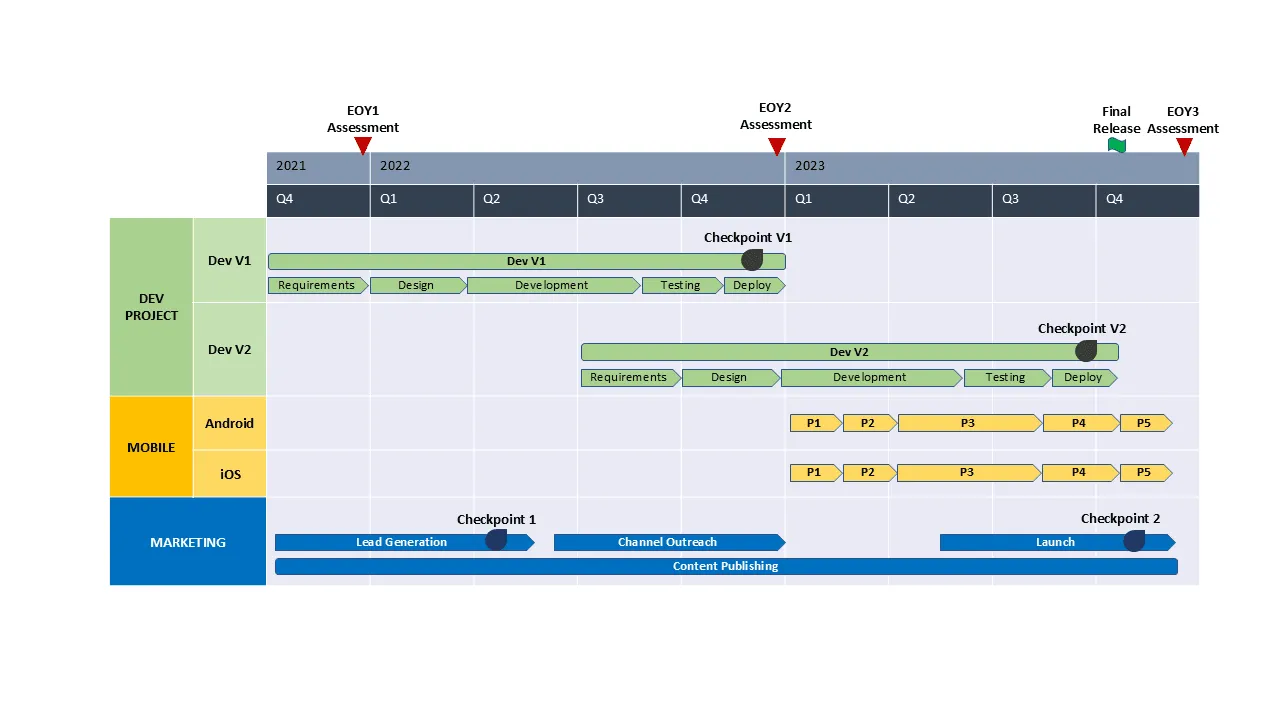
After labelling project phases and milestones and applying some other minor edits and tweaks, here is how our manually created PowerPoint roadmap looks like. Below, you can also find a version of it saved as a .ppt file that you can download, edit, and use as a roadmap template for free.
Get this free roadmap template
How to make a roadmap in PowerPoint automatically
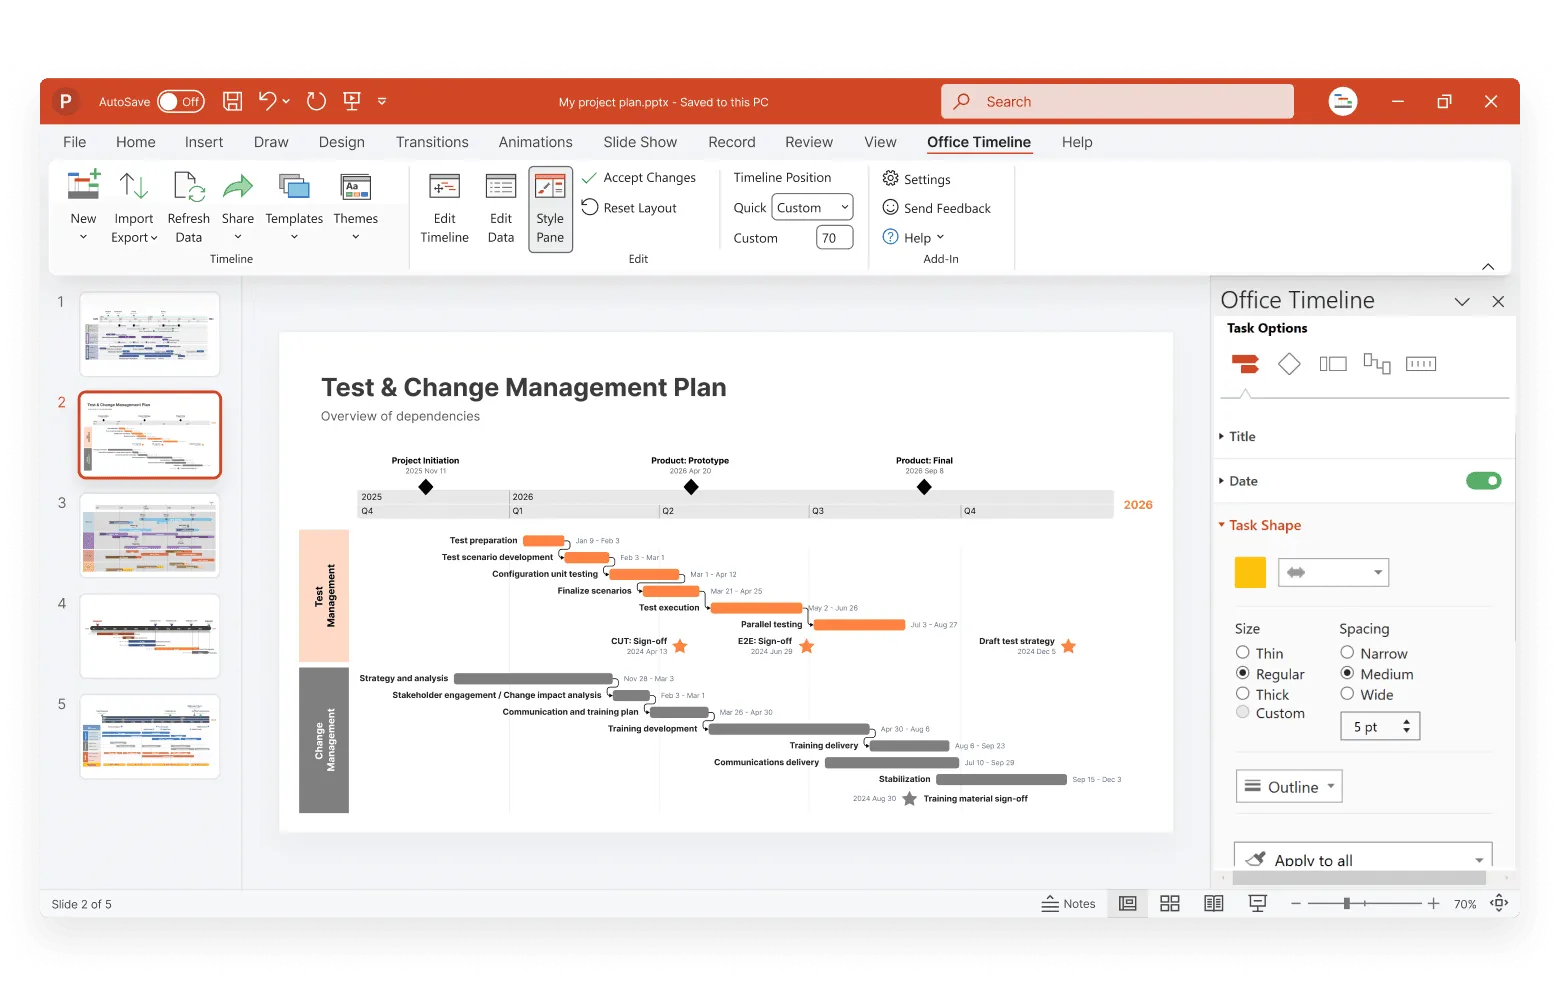
As shown above, manually creating a roadmap in PowerPoint is possible but takes a lot of time and customization effort. The hours spent to do this can be turned into mere minutes with the intuitive add-in for PowerPoint called Office Timeline. The tool comes with an extensive library of pre-built roadmap templates.
Below, we will describe every step in the process of automatically making a roadmap using Office Timeline. To get started, install the free trial of the Office Timeline add-in, which will add a roadmap maker tab to the PowerPoint ribbon.
1. Create a new file with Office Timeline.
a) After installing the add-in, you’ll find the Office Timeline tab on the PowerPoint ribbon. Click on New.
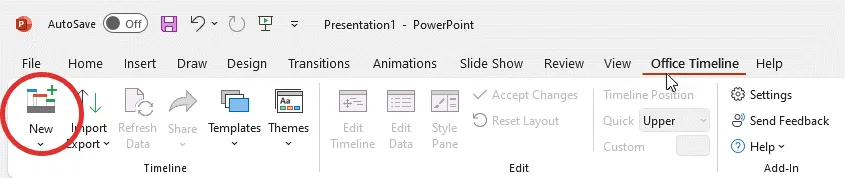
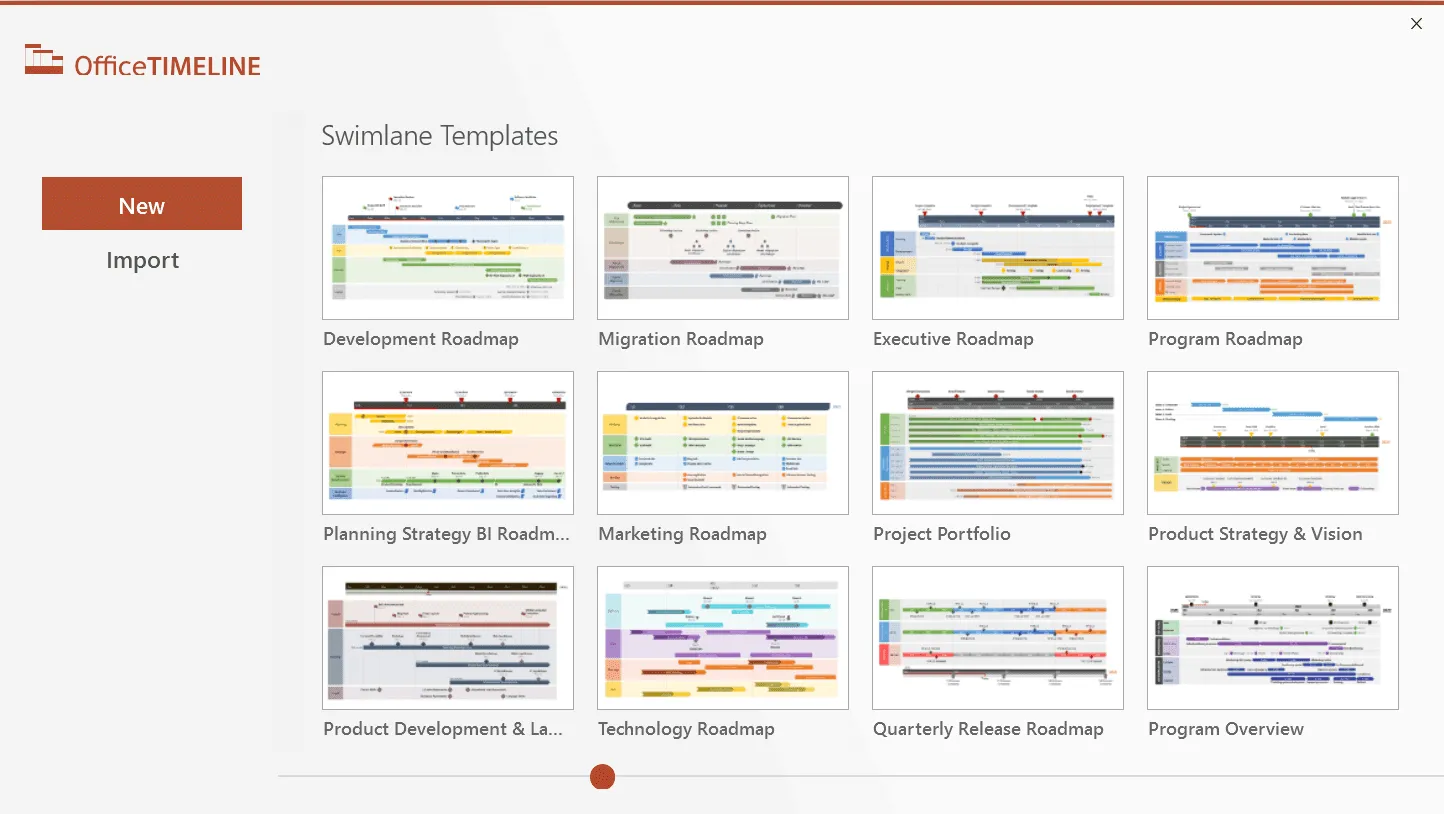
This will open a template gallery where you can choose a style to use for your roadmap.
b) Double-click on the template you prefer to select it and click Use Template in the preview window. For our example, we will use Product Strategy&Vision.
2. Enter your data into the Office Timeline wizard.
In the Data Entry wizard that opens, you can either enter your data manually, or you can copy-paste it from an existing Excel file. While here, you can also change shapes or colors of tasks and milestones, but more customizations can be done later as well.
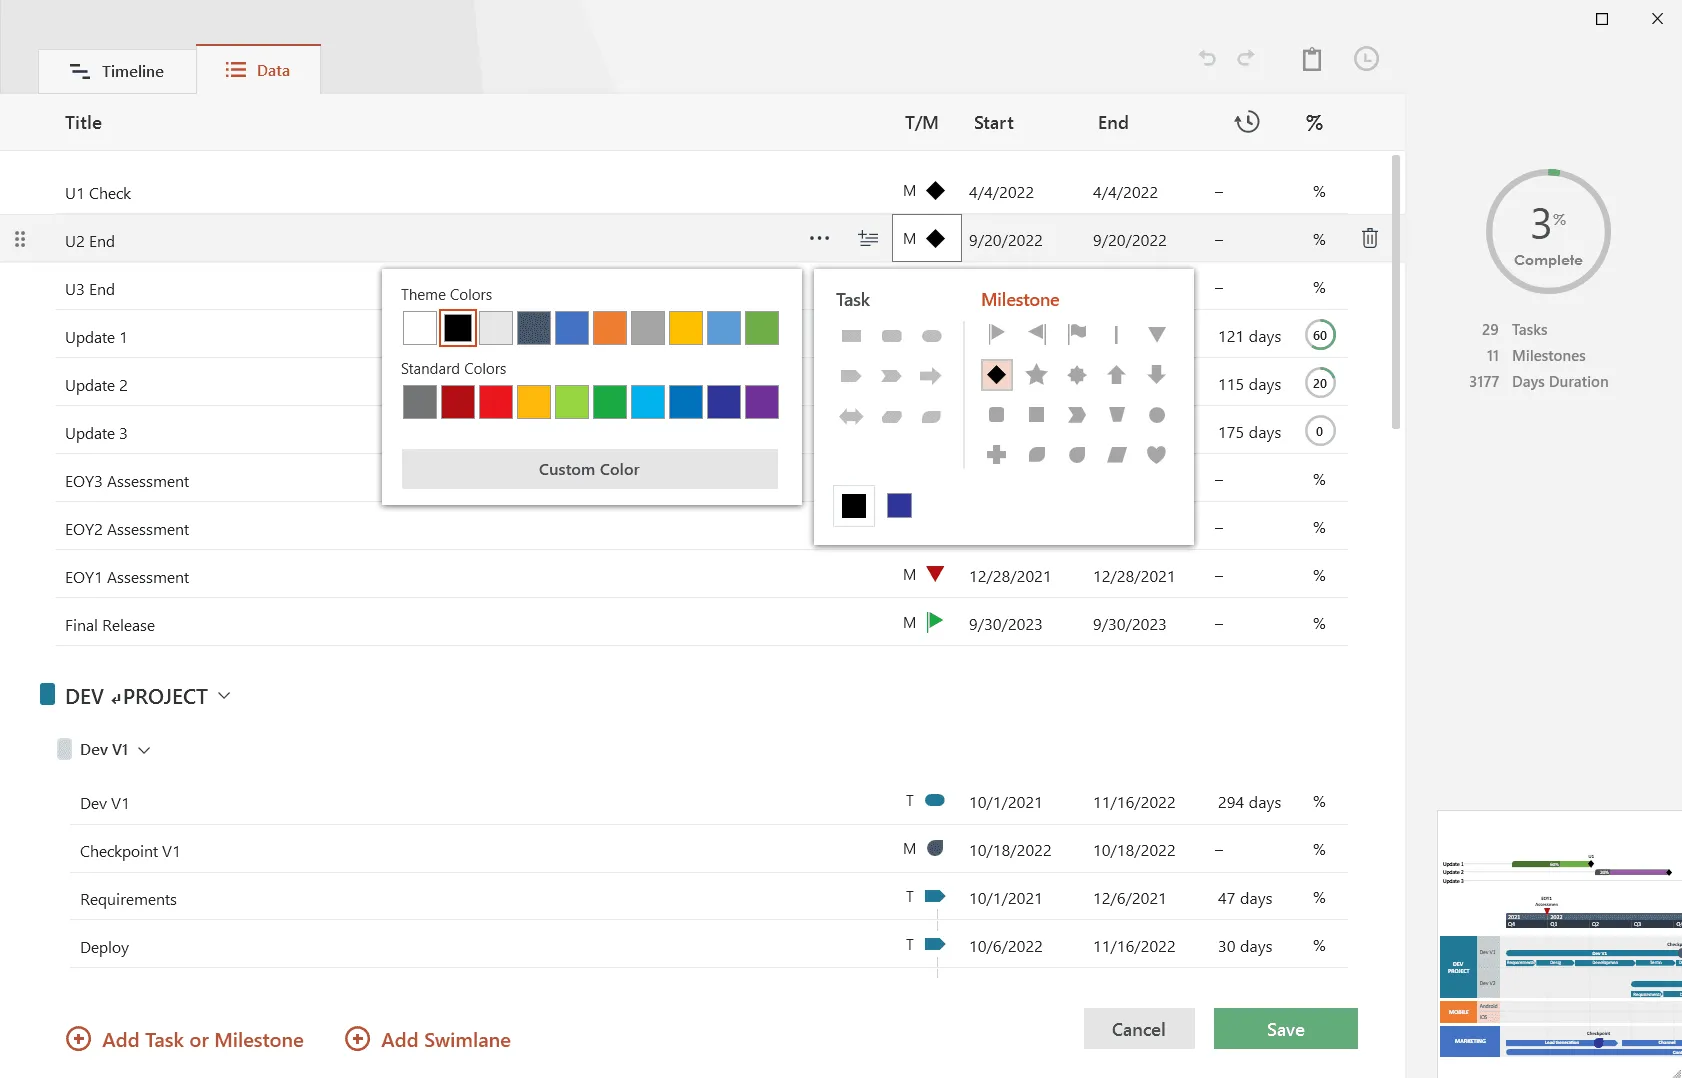
When ready, click the Create button. A new roadmap slide will be instantly generated in PowerPoint.
3. Customize your roadmap.
Once your roadmap has been generated, you can customize it or update it automatically using Office Timeline. You can add, remove, or edit all data, format fonts and shapes of tasks or milestones, and include extra details such as Task Duration, Percent Complete or Today’s Marker, among others.
In our example, we’ve changed colors, simplified the timeband and removed a few items that were overcrowding the graphic. To improve the overall layout and enhance the clarity of our roadmap, we’ve also repositioned some of the task-associated shapes, entered a couple of milestones and added % complete indicators to our tasks.
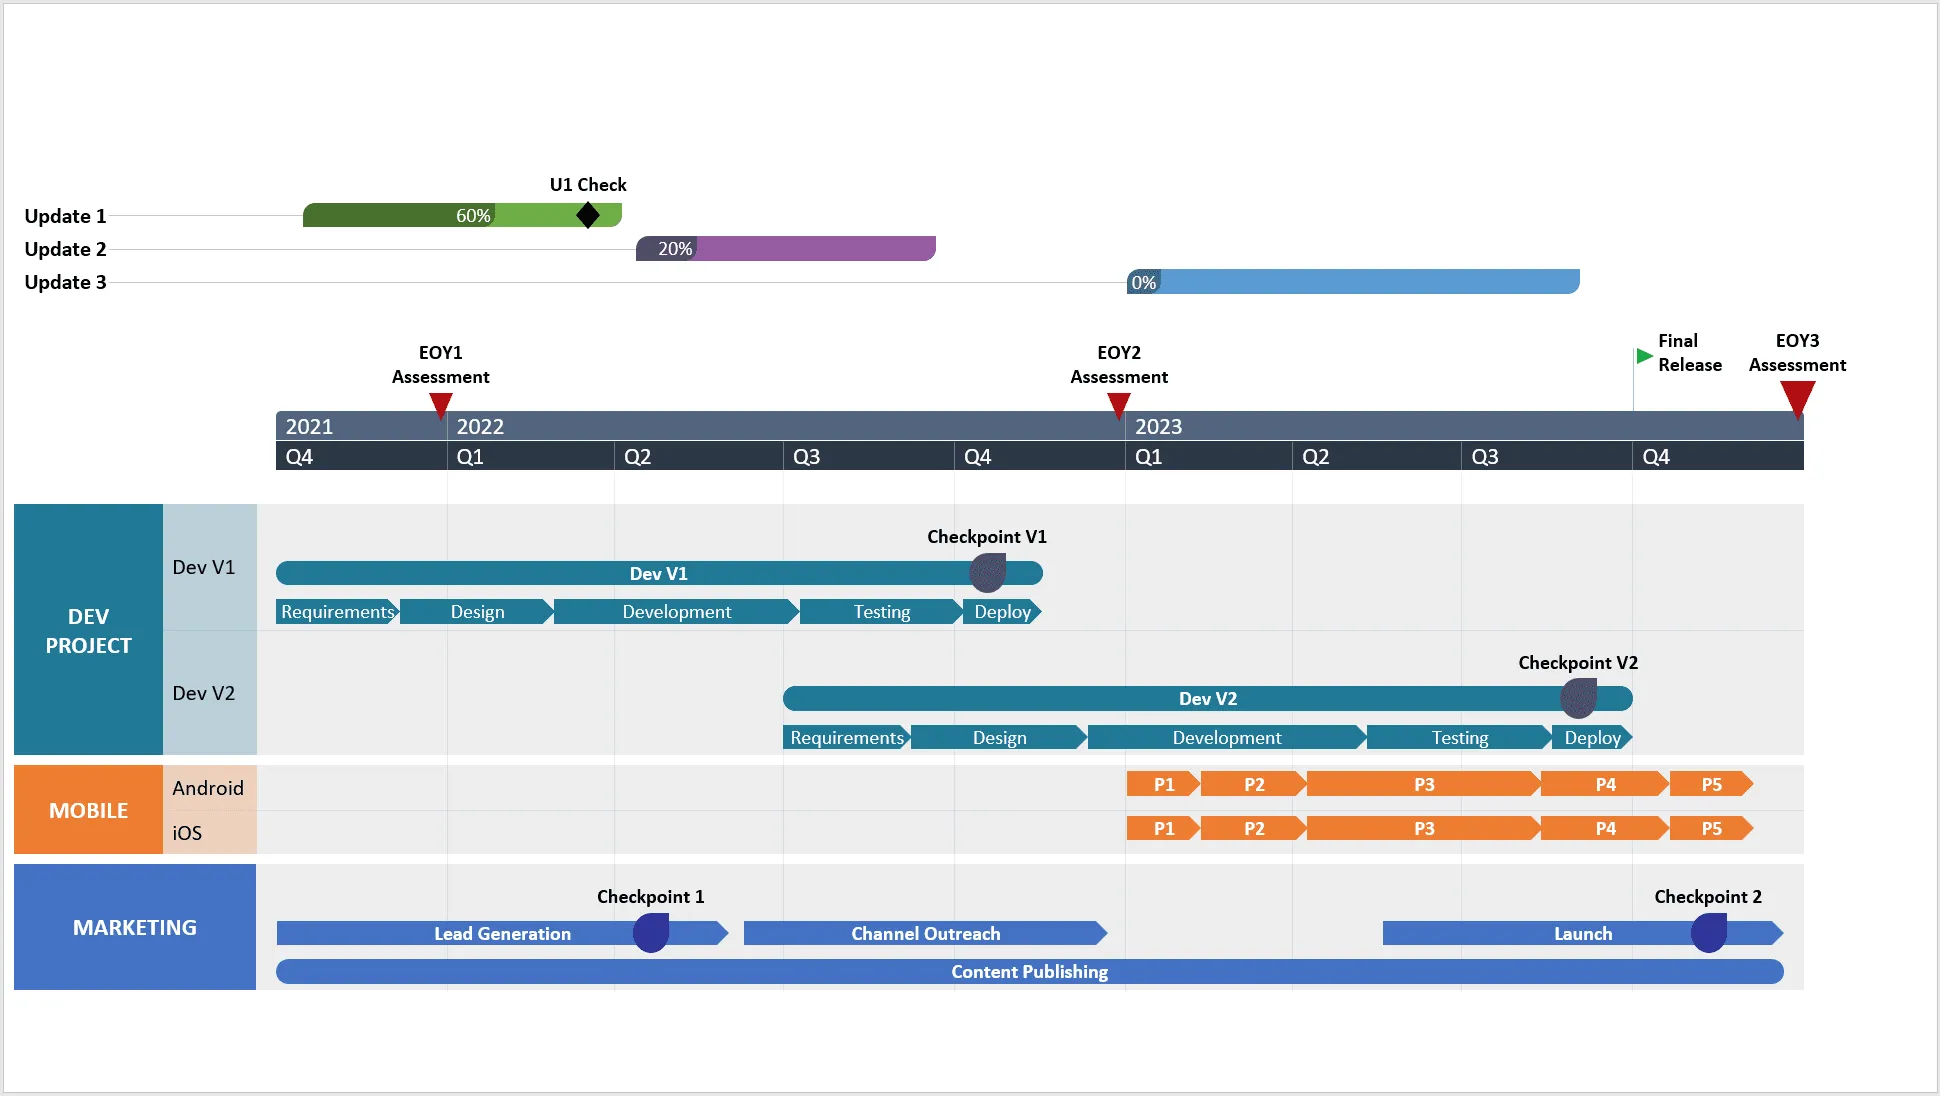
Get this free roadmap template
FAQs about making roadmaps in PowerPoint
There are several ways in which you can create roadmaps in PowerPoint for free. Here are two of the easiest ones:
A. Draw a roadmap from scratch.
You can make a roadmap for free if you have some basic design skills and some time on your hands by following the steps below:
- Draw a vertical axis (for projects/teams) and a horizontal axis (for time).
- Add project/team names on the vertical axis and time reference units on the horizontal axis.
- Insert shapes to be used as project components or team tasks.
- Position shapes within the corresponding time slots.
B. Use templates.
Another easy way to create a basic roadmap in PowerPoint is with the help of PowerPoint’s built-in templates. To find them, go to Home > New and type “roadmap” in the search box. However, bear in mind that these are just basic roadmap slide templates that you can only use for very simple projects, with few tasks.
The downside to both methods is that you’ll need a lot of time to work on customization and the results might be below expectations. The good news is that you can make roadmaps in PowerPoint automatically in minutes and get professional-looking visuals with the Office Timeline add-in – you can try it for free.
A roadmap PowerPoint template is a pre-made visual summary of a strategic plan, created as an editable PowerPoint slide. A roadmap defines a goal and includes the main steps, tasks or milestones that are needed in order to reach that goal. You can use a PowerPoint template to make roadmaps faster and with less effort.
Yes, there are several roadmap templates in PowerPoint that you can use for your own presentations. You can find them accessing Home > New and typing “roadmap” in the search box under “New”. Unfortunately, the selection is quite limited, the result is not dazzling, and they only work for simple projects, with very few items.
If you’re looking for faster, more easily customizable alternatives that can help you get professional-looking designs, browse our roadmap template gallery.