Webinar recap | Visual timelines: the reporting skill PMs aren’t taught (but should be)
Explore key highlights from the webinar where Office Timeline experts joined PM Place to show Project Managers how to build engaging timelines.

Project updates shouldn’t be harder than managing the project itself. But too often, timelines are stuck in spreadsheets, buried in slides, or unclear to anyone outside the core team.
In our recent webinar with PM Place, the Office Timeline team shared practical ways to simplify reporting and turn your project data into clear, visual timelines.
Whether you joined live or are just catching up, here’s a recap of how you can make your project updates faster, more effective, and stakeholder-ready.
What PMs are really struggling with
Before diving into solutions, here are some of the most common challenges we hear from project managers:
- Timelines that don’t communicate clearly: Stakeholders need to understand what’s on track or falling behind without digging through slides or spreadsheets.
- Spending too much time rebuilding timelines: Manual updates can take hours and often result in inconsistent formatting or duplicate work.
- Juggling multiple tools across multiple projects: Switching between platforms creates extra steps and increases the risk of missed updates or reporting errors.
Here’s how to solve it
These are the practical strategies you can use right now to simplify reporting and build timelines that actually get read.
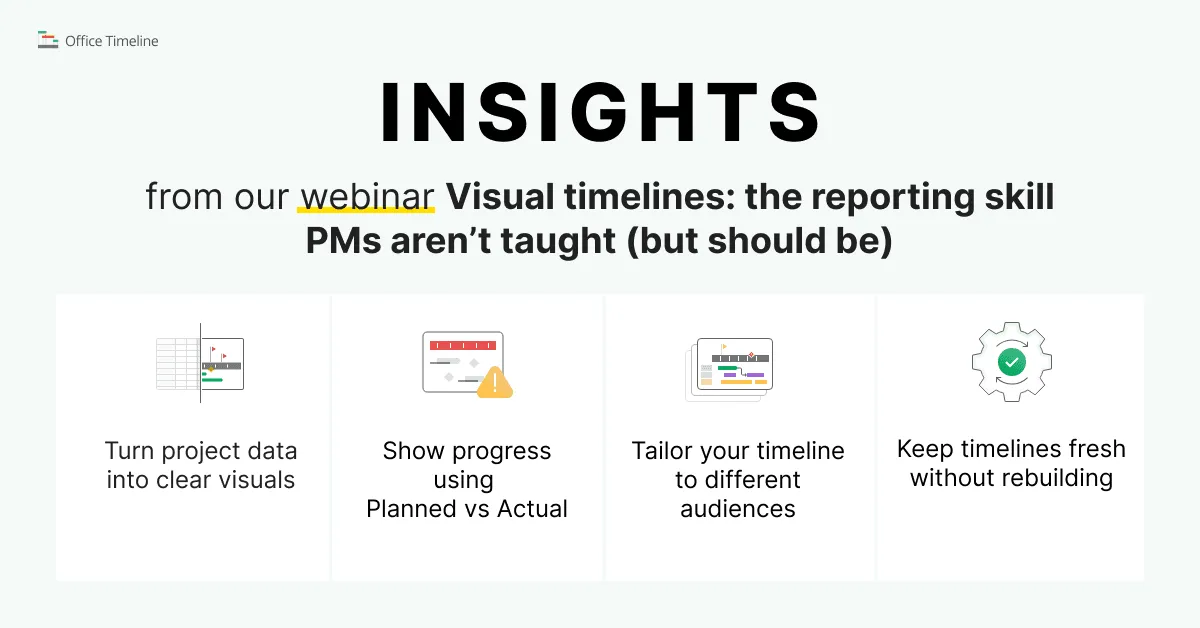
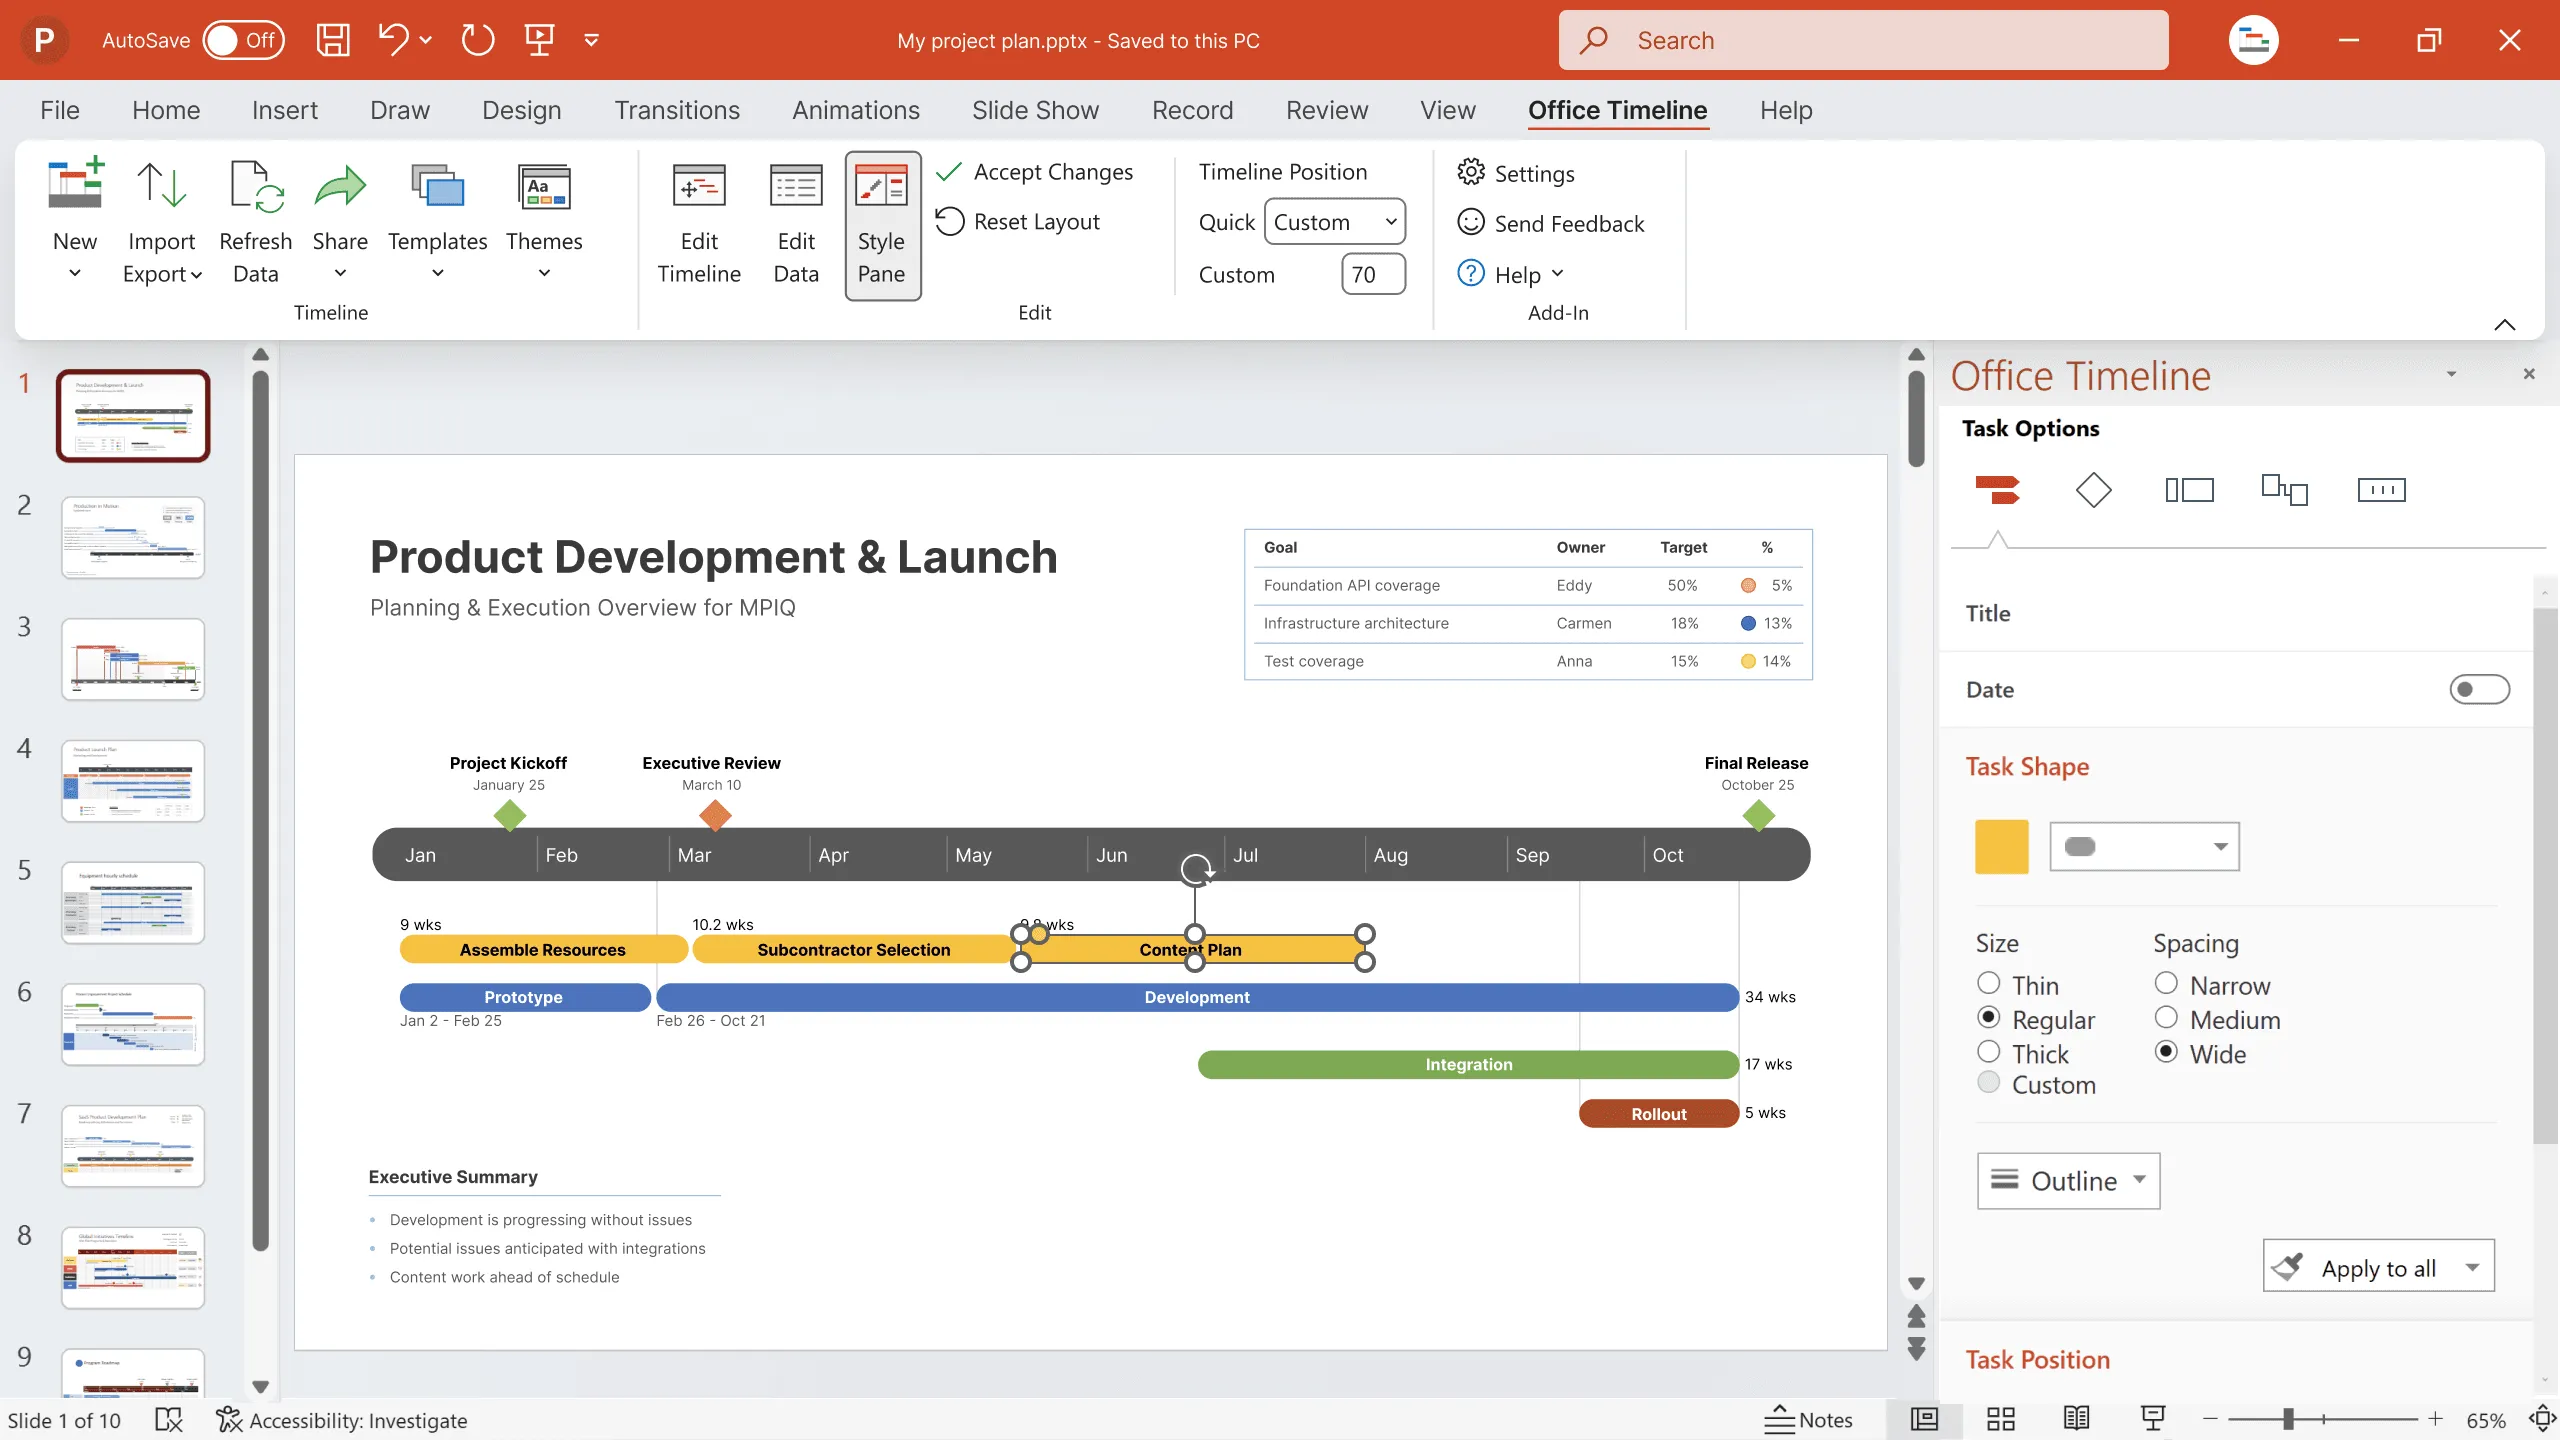
1) Turn project data into clear visuals
Instead of building timelines from scratch, import your data directly from Excel, Smartsheet, or Microsoft Project. Once your columns are mapped, updates will sync automatically while keeping your formatting intact.
Pro tip: Use filters to highlight the most important milestones and reduce visual noise. This makes your timeline easier to scan in executive meetings.
2) Show progress using Planned vs Actual
Side-by-side bars and visual baselines let you compare your original plan to your current progress. It’s an easy way to communicate delays, accelerations, or status at a glance without needing extra commentary.
Pro tip: Use this view to proactively identify risks and maintain project health for leadership.
3) Tailor your timeline to different audiences
Not every update should look the same. With flexible templates and themes, you can adjust the timeline’s layout and details depending on who you're presenting to.
Pro tip: Save different versions of the same timeline for internal teams, leadership, and client-facing updates. You’ll save time and stay consistent.
4) Keep timelines fresh without rebuilding
When something changes in your project plan, just reimport the updated file and refresh the timeline. All your formatting, styles, and layout settings stay in place.
Pro tip: Timelines often need updates at the last minute. Having a fast, reliable way to make changes keeps your reporting on track without extra work.
Ready to try it out?
If you want to simplify your reporting and build timelines that communicate clearly, here are a few next steps to get started:
- Download the 14-day free trial and test these workflows on one of your current projects
- Use one of the built-in templates to skip setup and start building right away
- Watch the full webinar recording for a deeper walkthrough
Your next project update doesn’t need to be a time sink. With the right tools, it becomes a clear and compelling part of your workflow.
Project management tips and tricks
Turn project data into professional timelines
Get the advanced features of Office Timeline free for 14 days.