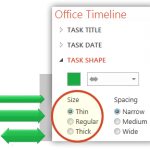
Step 1: Change the thickness of your task bands Adjusting the size of your taskBands will create more space on the slide. To change the thickness of all of task at one time, click the Style button on the Office Timeline ribbon, and go to the Tasks tab. If you prefer to adjust them individually, select the desired task band and click the Task Pane button on the ribbon. … [Read more...] about Quick Tip #4: Fit More Tasks
Office Timeline Tips
Quick Tip #3: Add Notes and Links
Step 1: From the Milestone or Task Wizard, click the Notes icon. When editing a Milestone or a Task, click on the Notes icon to bring up the Note feature. Step 2: Type or paste right into the Notes box. This can be text from documents, tables from a spreadsheet or URL’s linking to important files on your desktop, team portal or internet. Step 3: Save Notes by … [Read more...] about Quick Tip #3: Add Notes and Links
Quick Tip #5: Instantly change the look of your timeline or convert it to a table.
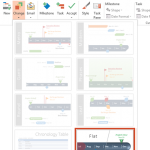
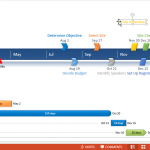
Step 1: Click the Change button on the Office Timeline ribbon in PowerPoint From your timeline slide, click on the Change button to open your styling options. Step 2: Select a new style. Select Flat or Gel to choose between a modern look for your timeline, or a rounded look with shadows. select the Chronology Table to automatically create a new slide with your … [Read more...] about Quick Tip #5: Instantly change the look of your timeline or convert it to a table.
Quick-Tip #2: Position Milestones Exactly Where You Want Them
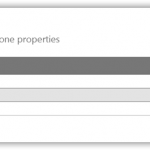
Step 1: Manually re-position your milestone markers. Click on the text box of the milestone you want to re-position and drag it vertically to a new position as shown in the image below. This can be done for both milestones that are positioned above or below the time band. Step 2: Click accept and choose Accept Manual Changes. Once you have moved your milestone to the … [Read more...] about Quick-Tip #2: Position Milestones Exactly Where You Want Them
Quick Tip #1: Copy and Paste from Excel
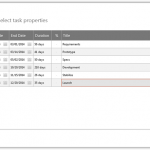
Step 1. Copy from Excel. Organize your Task and Milestone data into two Excel tables as shown here. Task tables should include a start date, end date and a description arranged next to each other. Milestone tables should have a milestone date and description also arranged next to each other. Now copy your first table. Step 2: Click the Paste icon. From the Office … [Read more...] about Quick Tip #1: Copy and Paste from Excel